We will walk through the step-by-step configuration of a GPO for Dot1x authentication. The GPO will push Dot1x configuration on a domain-joined machine. Using 802.1x authentication configuration, we can authenticate a user and the machine. For further details on GPO, refer to the Microsoft website. Refer to previous post on the blog to configure the setting locally on a machine.
GPO for dot1x authentication – GPO creation
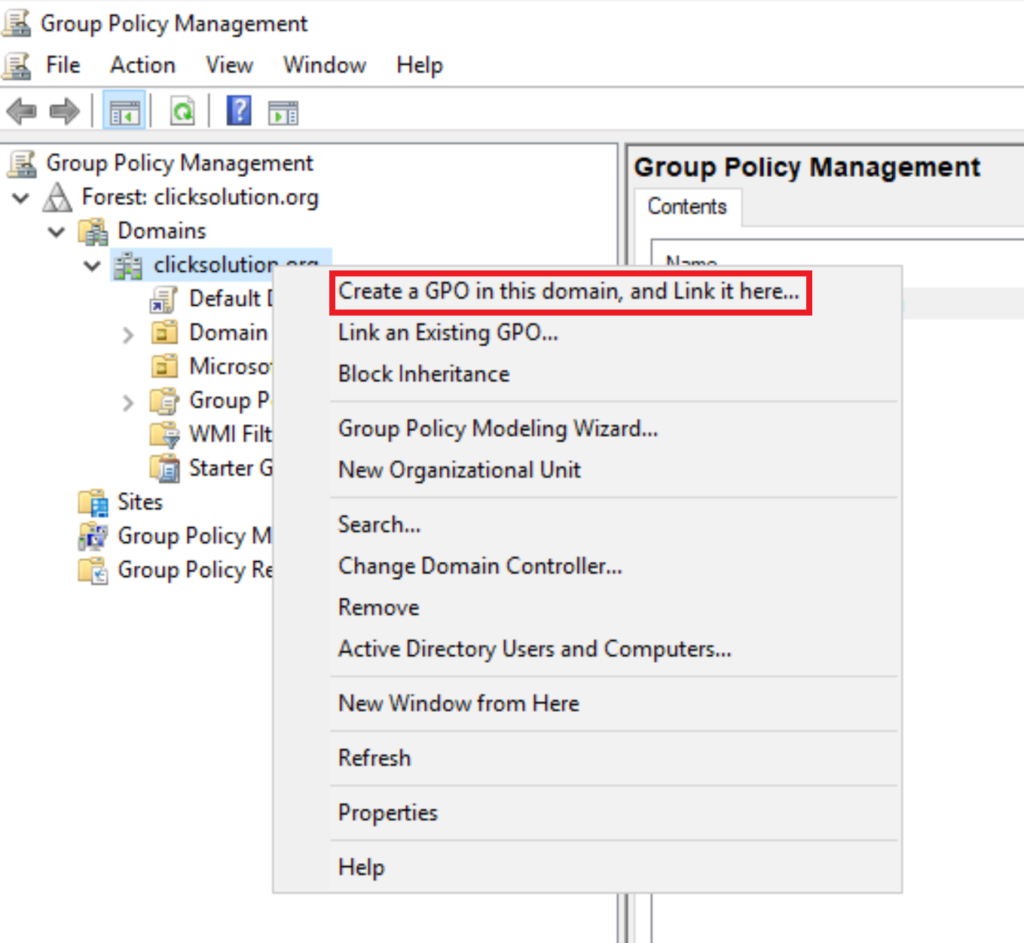
Open Group policy management. Expand the domains, right-click on the domain, and select “Create a GPO in this domain” to create a new GPO.
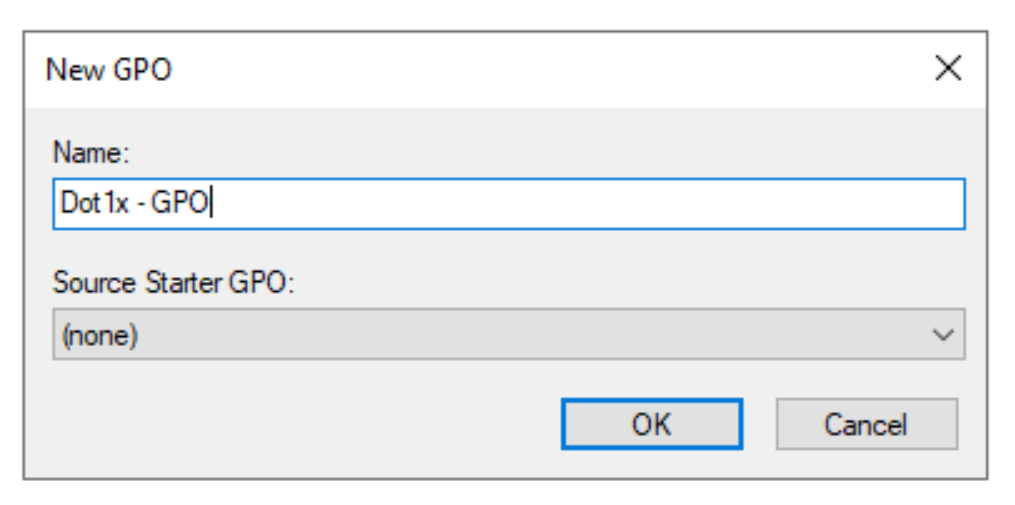
Give a name to the GPO.
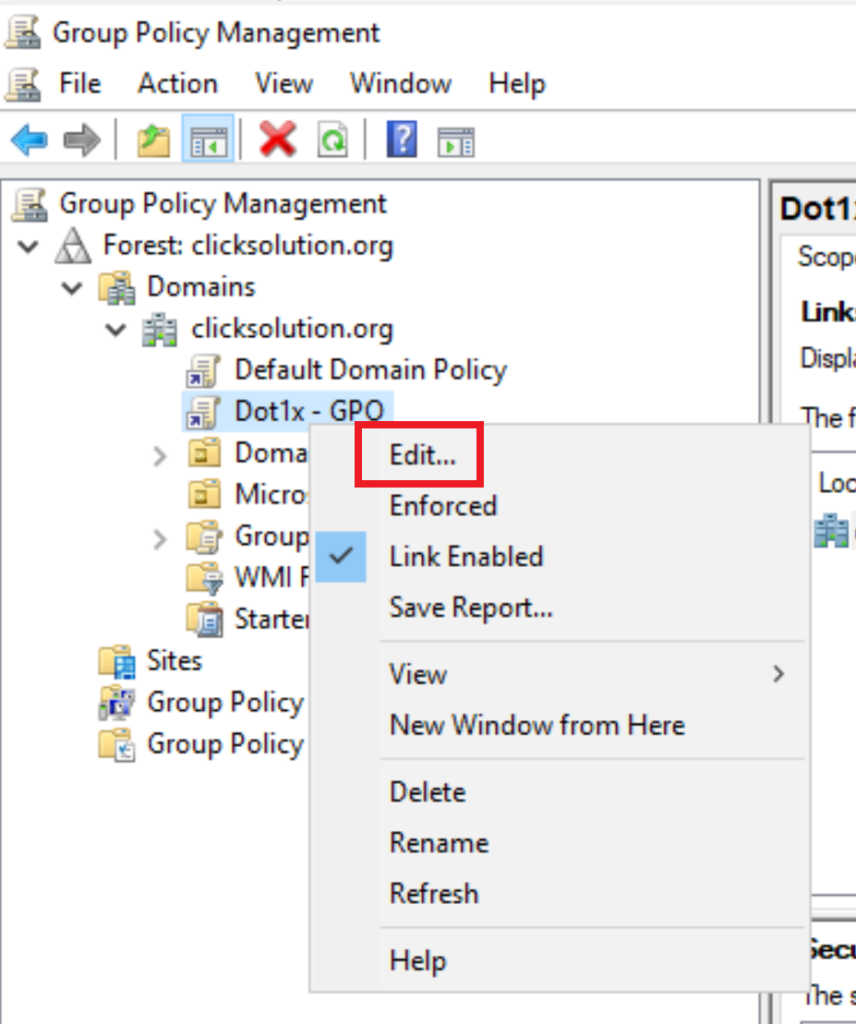
Right-Click on the newly created GPO Policy and select edit.
GPO for dot1x authentication – Wired Auto Config
Expand Computer Configuration> Policies > Windows Settings > Security Settings > System Services. Navigate to Wired AutoConfig and Double-click to change the setting.
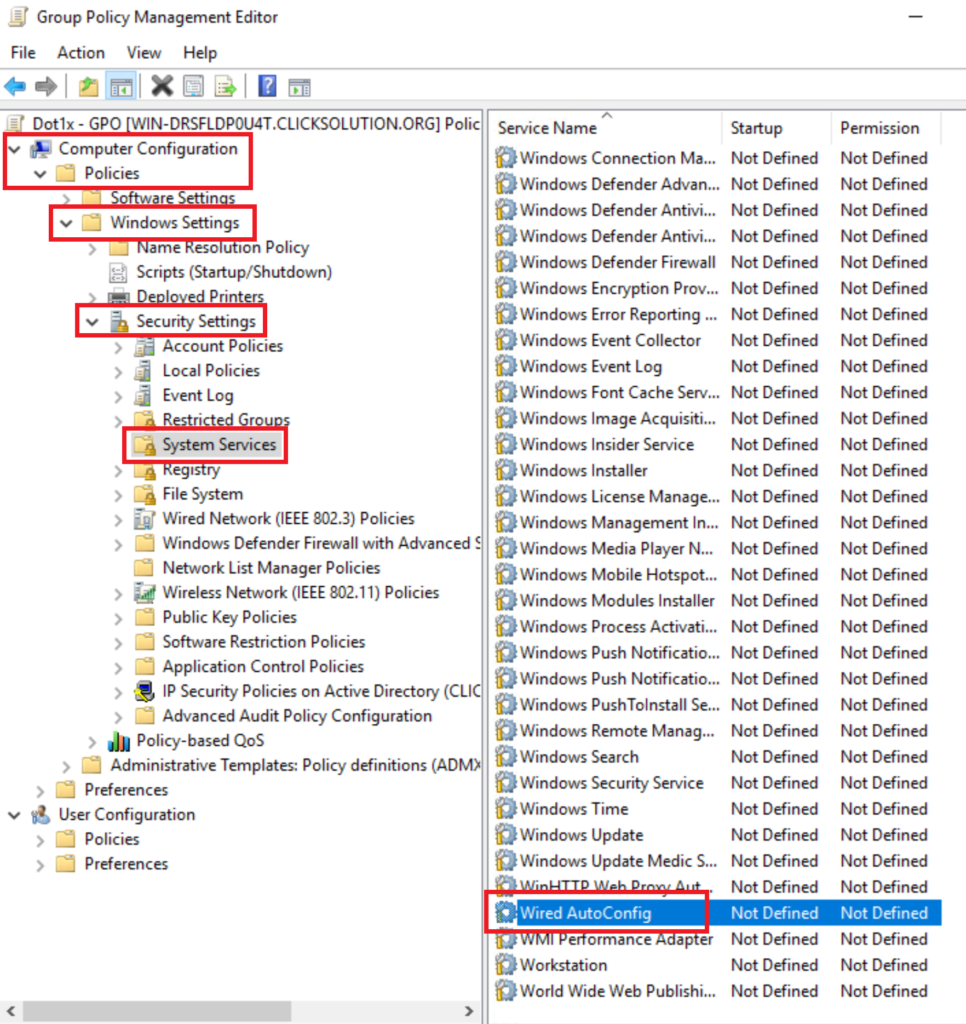
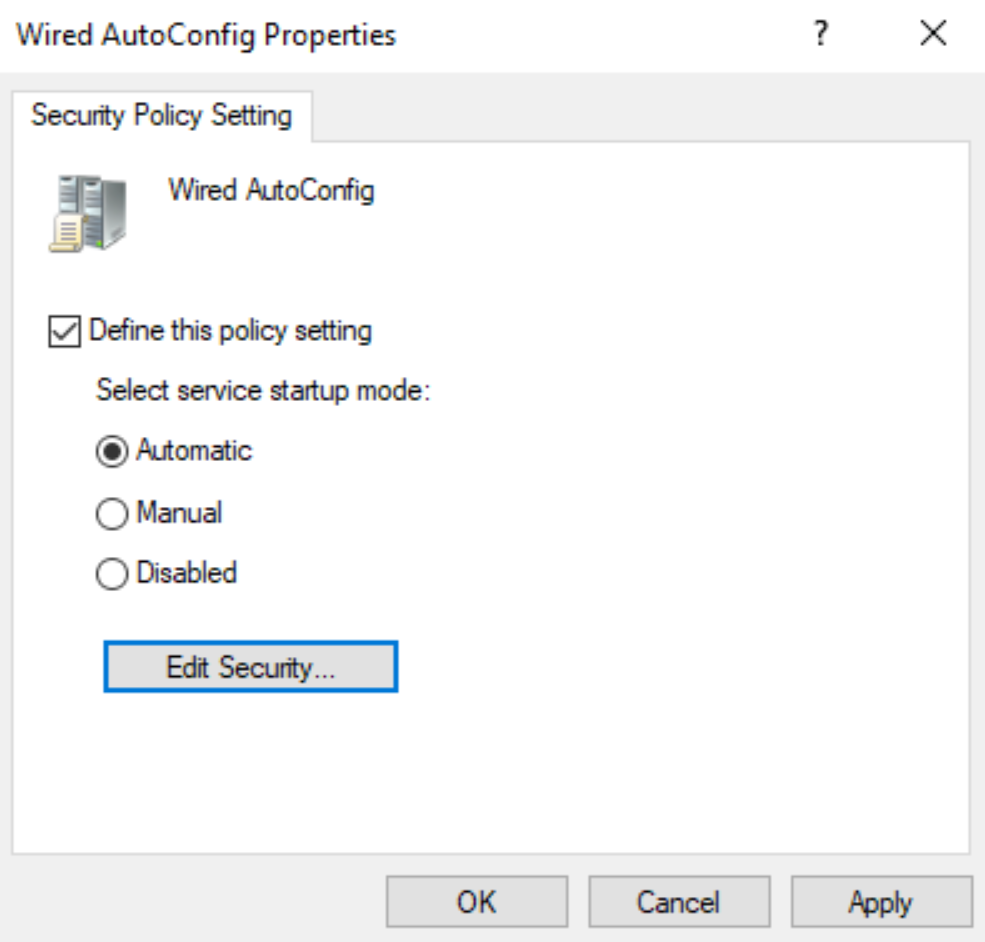
Set the service startup to Automatic. Click Ok.
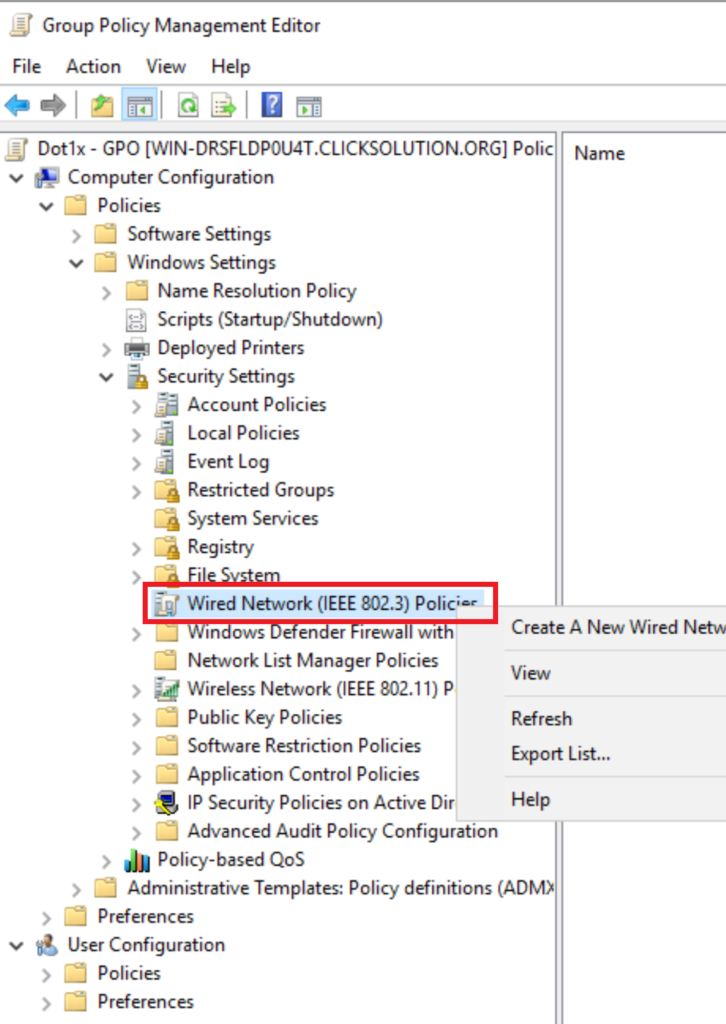
Navigate to Computer Configuration > Windows Settings > Security Settings > Wired Network (IEEE 802.3) Policies and Right-Click and Create a new wired network Configuration
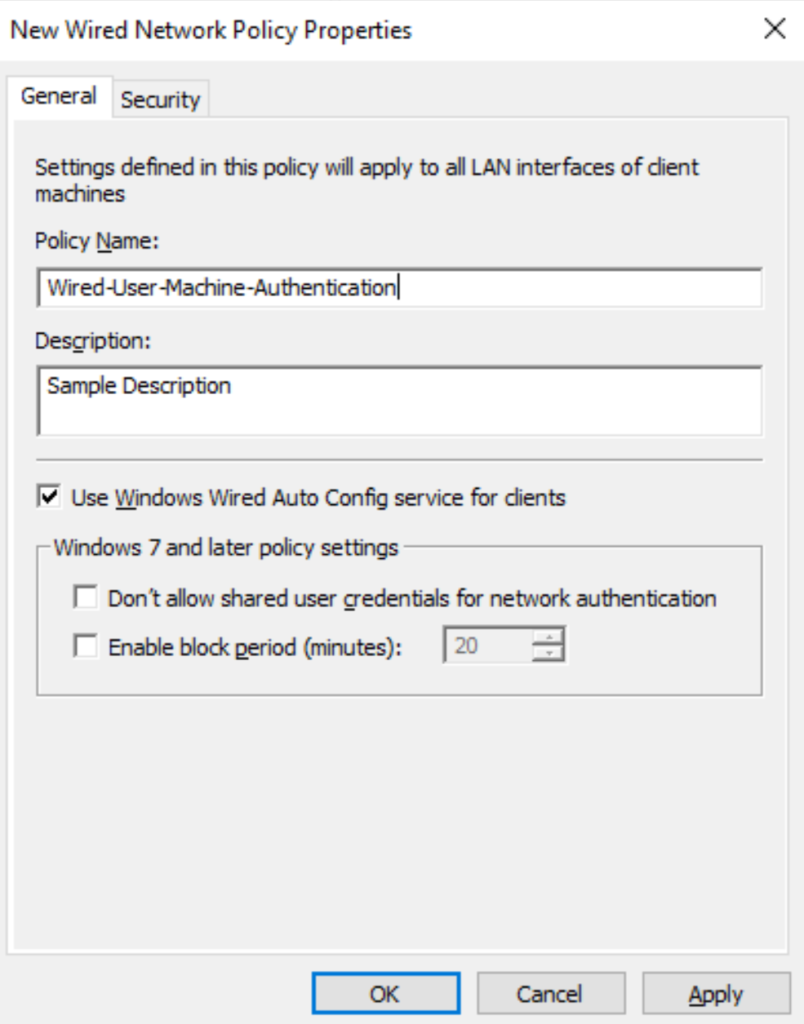
Give a Name to the policy.
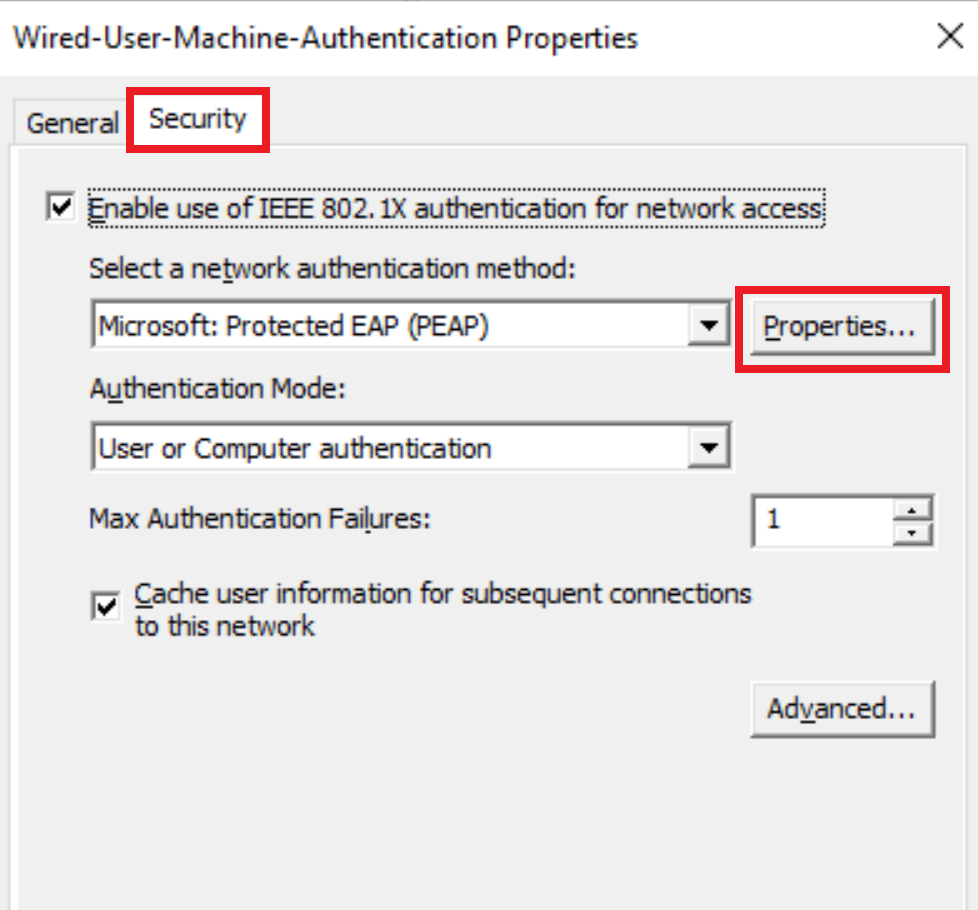
Navigate to the Security tab select the desired authentication method from the drop-down menu, and click on its Properties to configure advanced options.
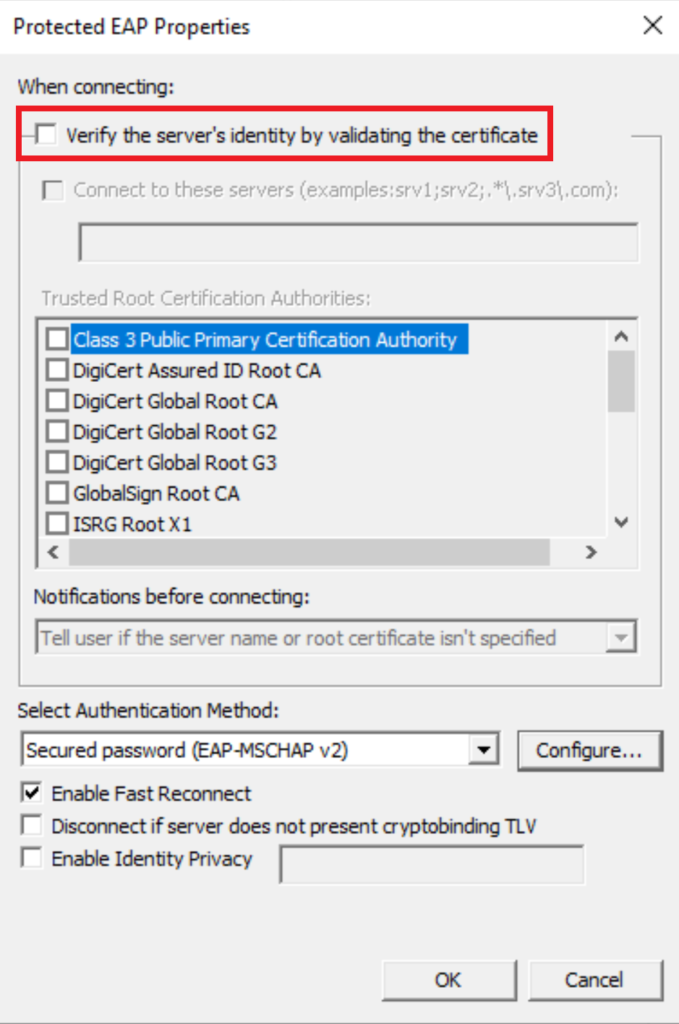
To avoid issues due to self-signed certificates, disable certificate verification. Leave other options as default and Click Ok.
GPO for dot1x authentication – Verification
Ensure the GPO is up to date on the endpoint. If not updated, one of the options is to do a force GP update on the machine.
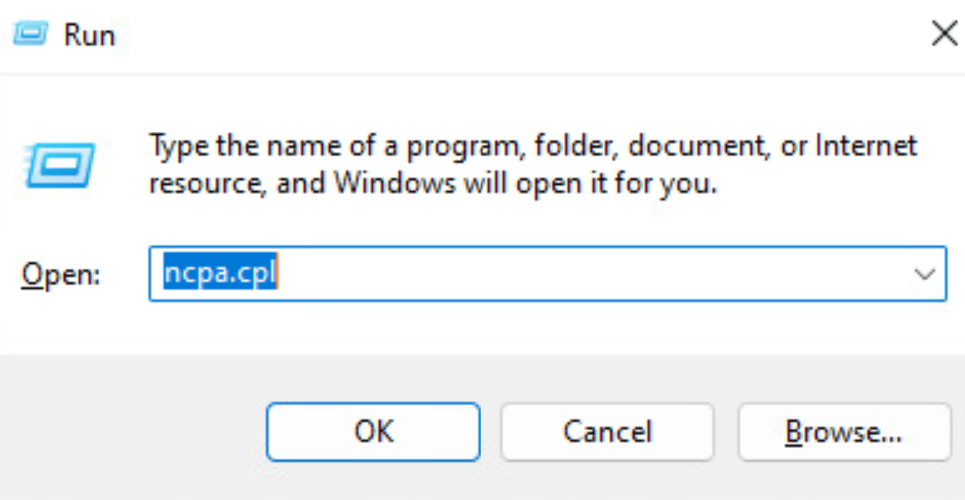
Step 1> Go to run and type ncpa.cpl hit enter:
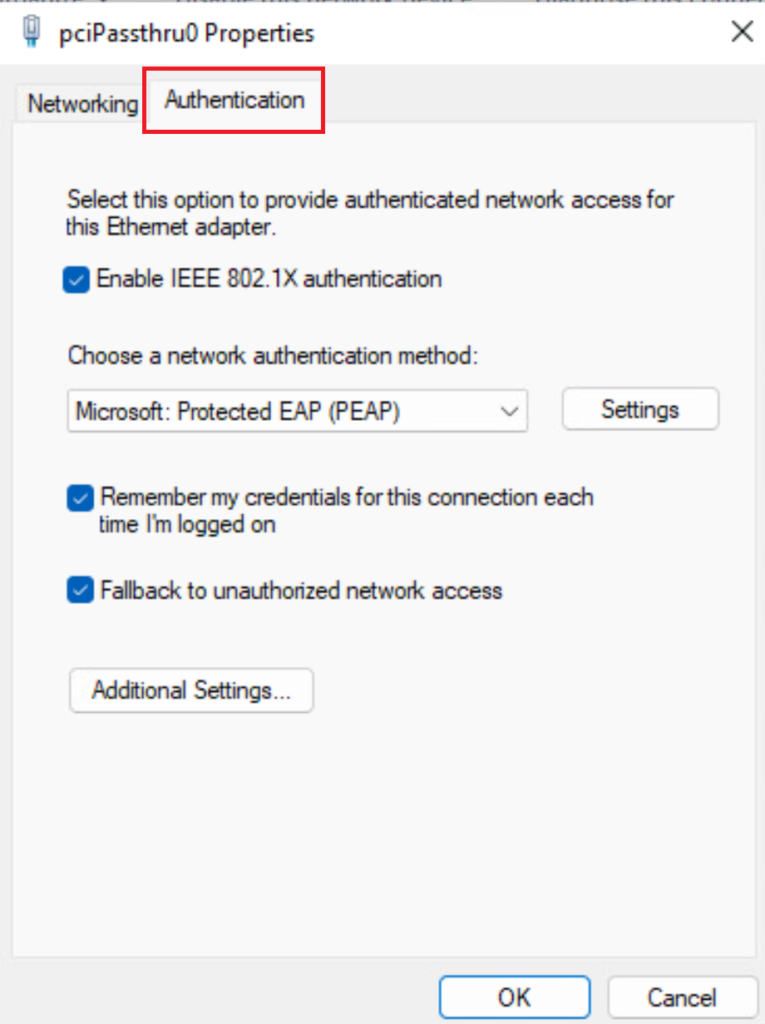
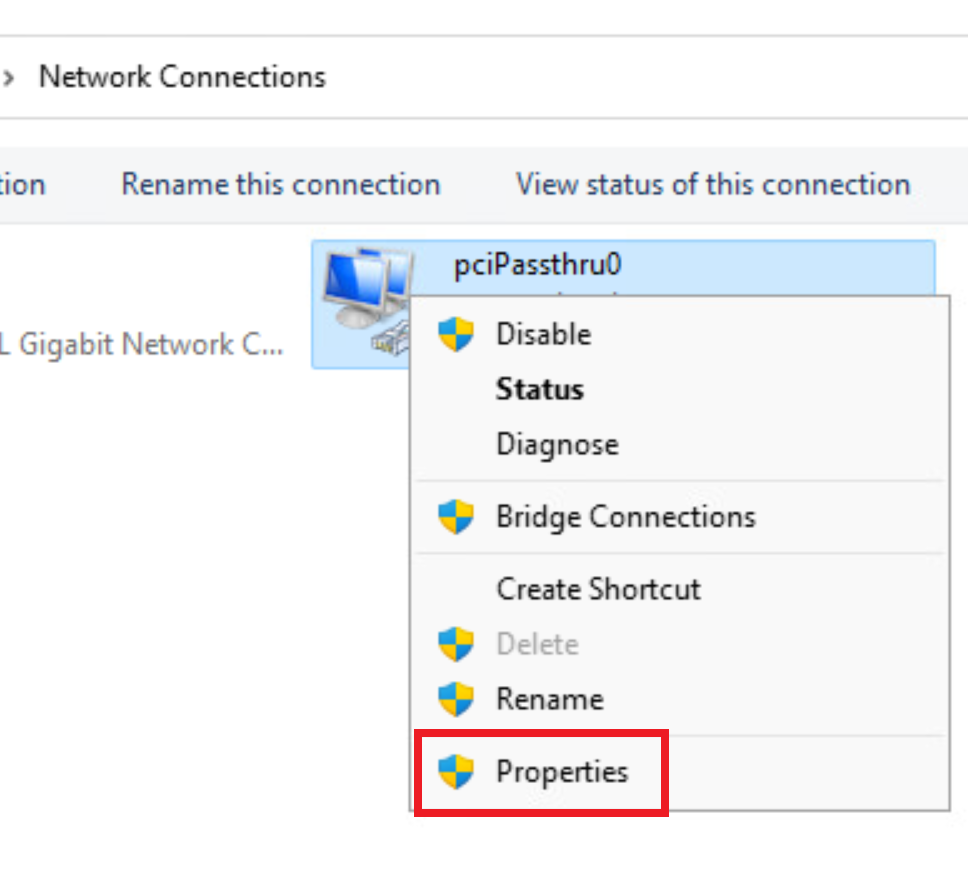
Step 2> Right-click on the wired nic and select Properties. We need to enter admin credentials to view the properties.
There must be a new authentication tab under the NIC properties.