In this guide, we will walk you through the Cisco ISE Aruba integration configuration for 802.1x authentication of the client with Cisco ISE posture and dynamic VLAN and role assignment from Cisco ISE for Aruba wireless clients.
The earlier post detailed Cisco ISE posture configuration provides posture-related configuration of Cisco ISE . In this post, we will focus on Cisco ISE configuration related to Aruba and the configuration of the Aruba wireless controller for 802.1x, dynamic VLAN assignment, and role-based access.
Cisco ISE Aruba Integration – Overview
The configuration involves the below 6 steps:
- Create A Network device profile
- Add Network device
- Configure Authorization profile
- Configure Aruba wireless SSID, Role, and Capitive portal configuration.
- Common troubleshooting checklist.
- Verification
Cisco ISE Aruba Integration – Network Device profile
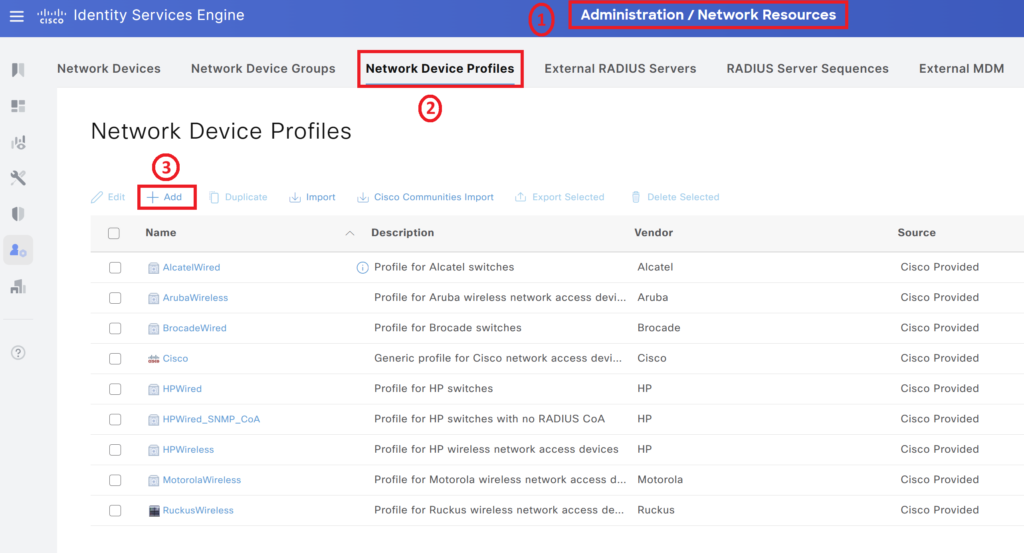
Step 1> Most important step is to create a correct network device profile. The Network device profile is used to configure ISE to send the correct parameter to Aruba to perform the desired actions. Create a network device profile: Navigate to Administration > Network device profiles > Click add. The profile can also be imported. You can get the device profile used for this post from Git Hub.
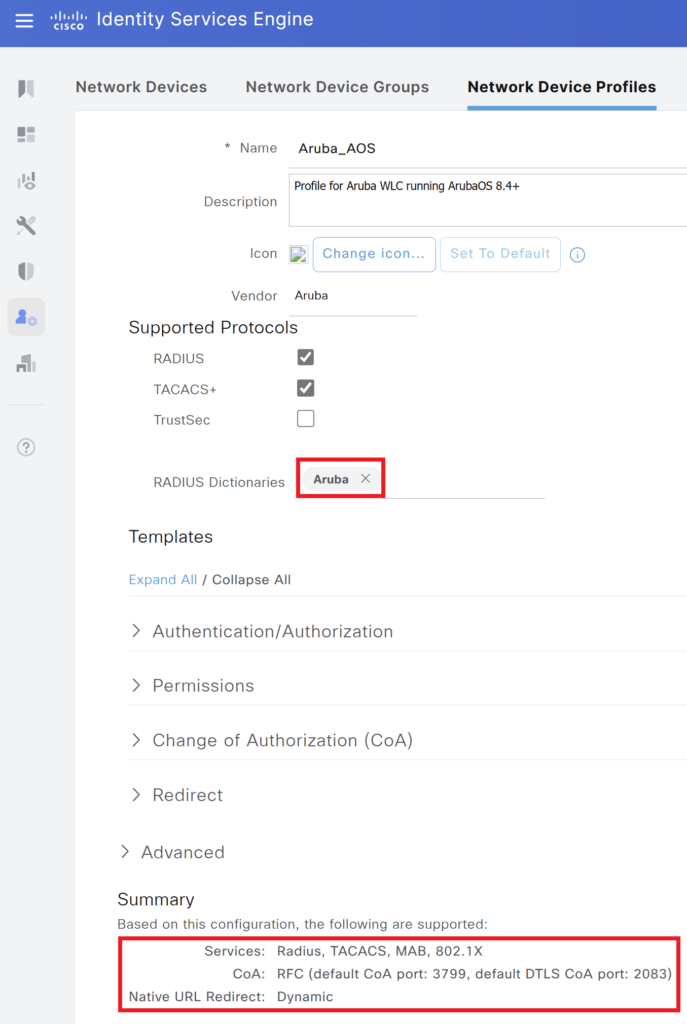
Ensure you select Aruba in the RADIUS Dictionaries. A Summary of the profile is shown below, CoA is enabled and Dynamic URL redirection is supported.
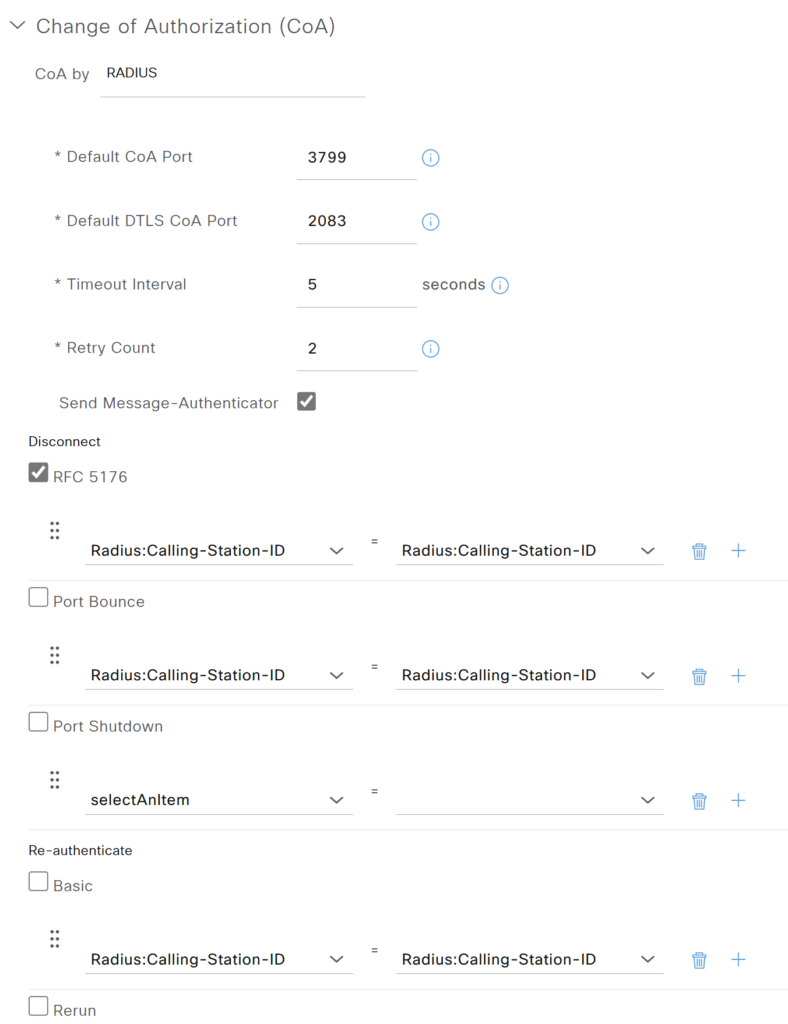
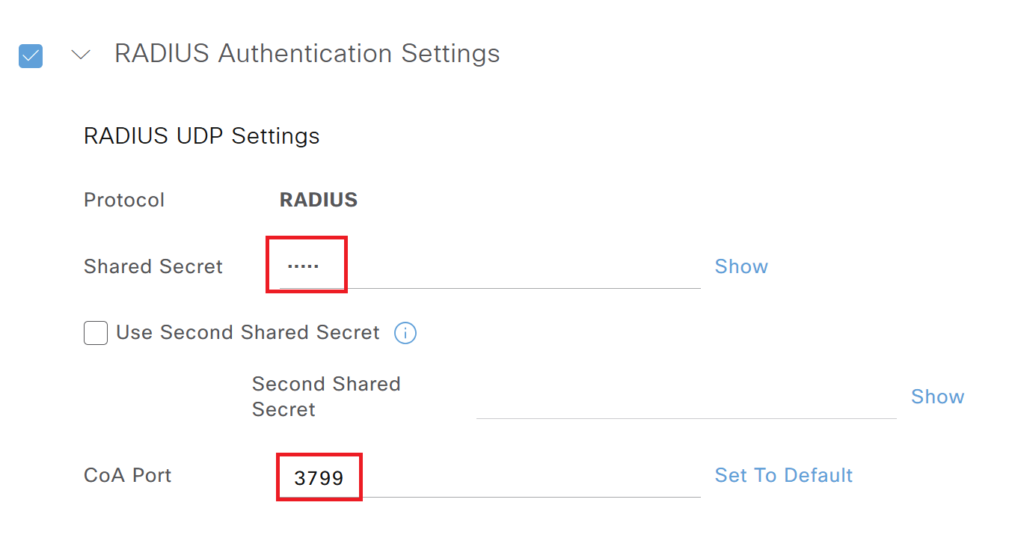
In the Change of Authorization ( CoA ) section UDP 3799 port is used.. We have selected Disconnect as anattribute for CoA.
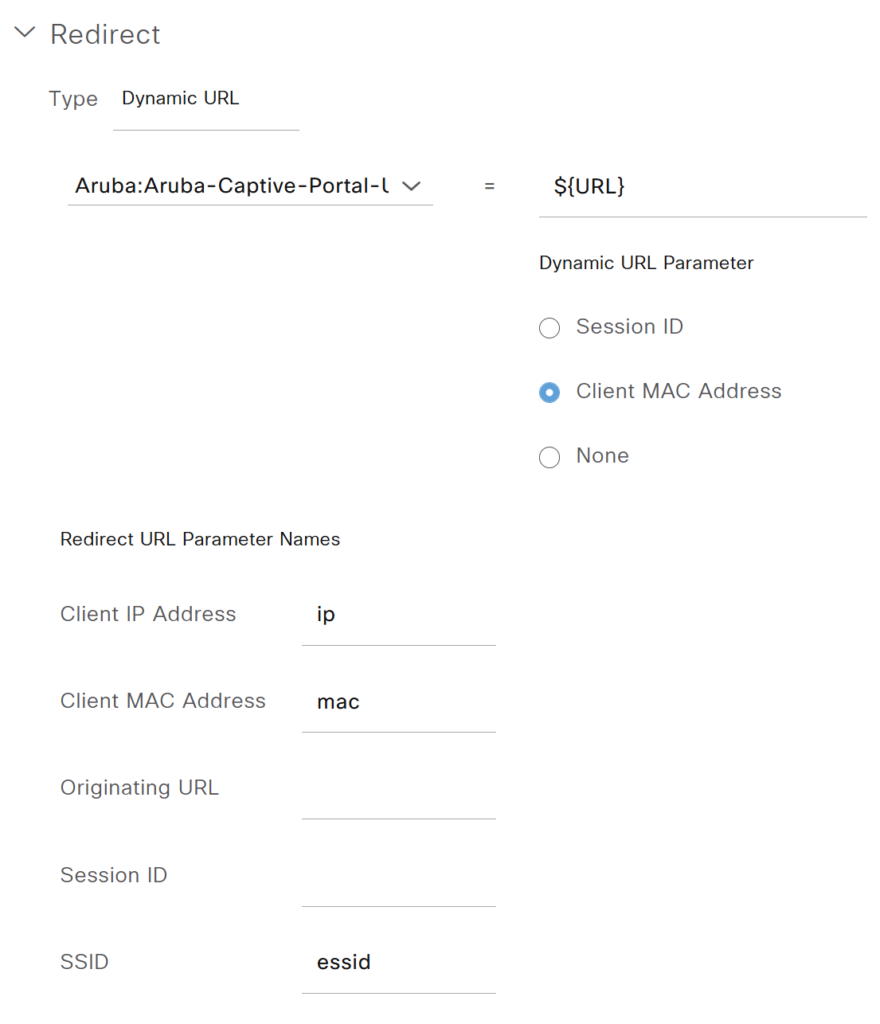
Under the redirection section, we have selected Dynamic URL
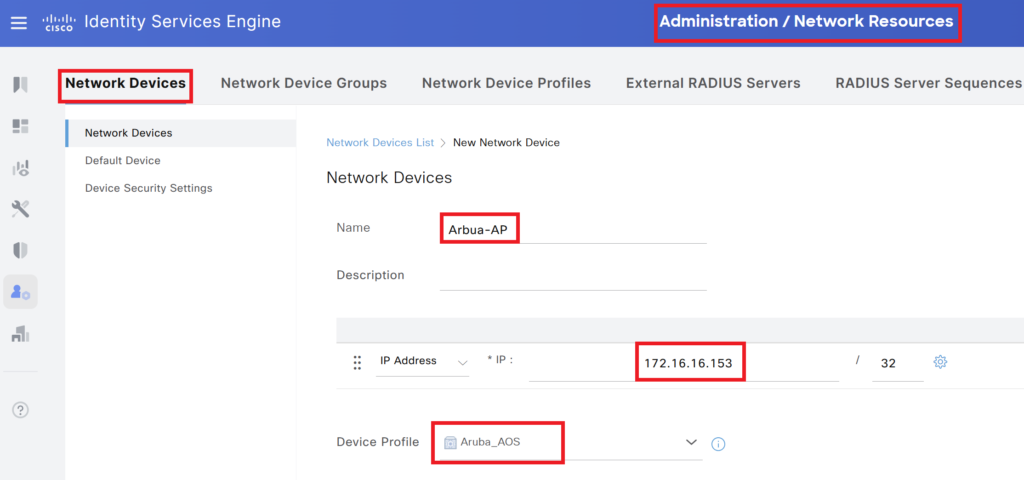
Cisco ISE Aruba Integration – Add Network Device
Step 2> We need to add the IP address of the Aruba IP. Ensure to select the network device profile configured in step 1.
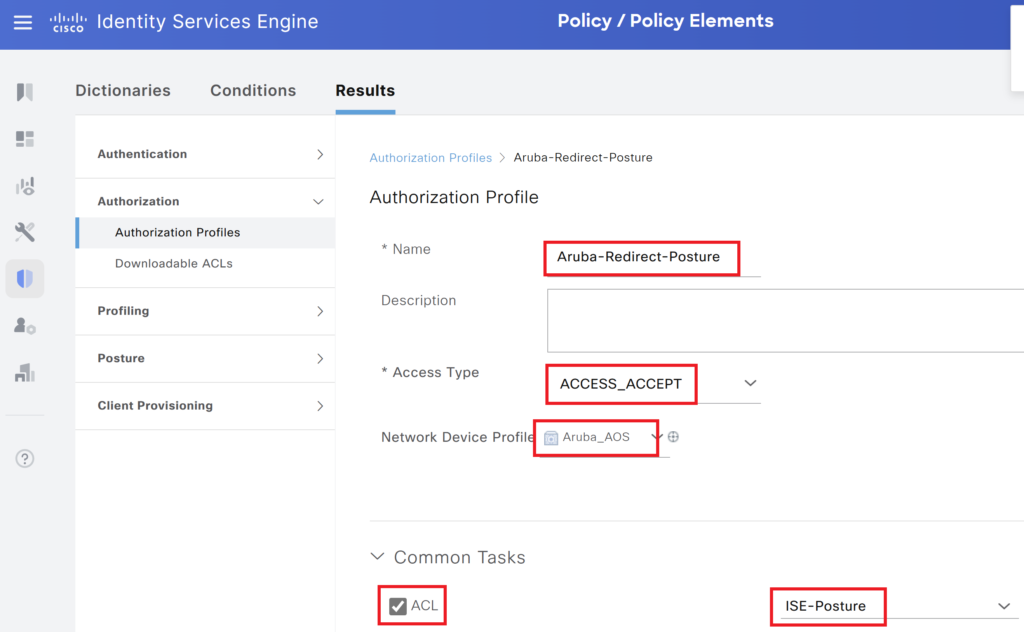
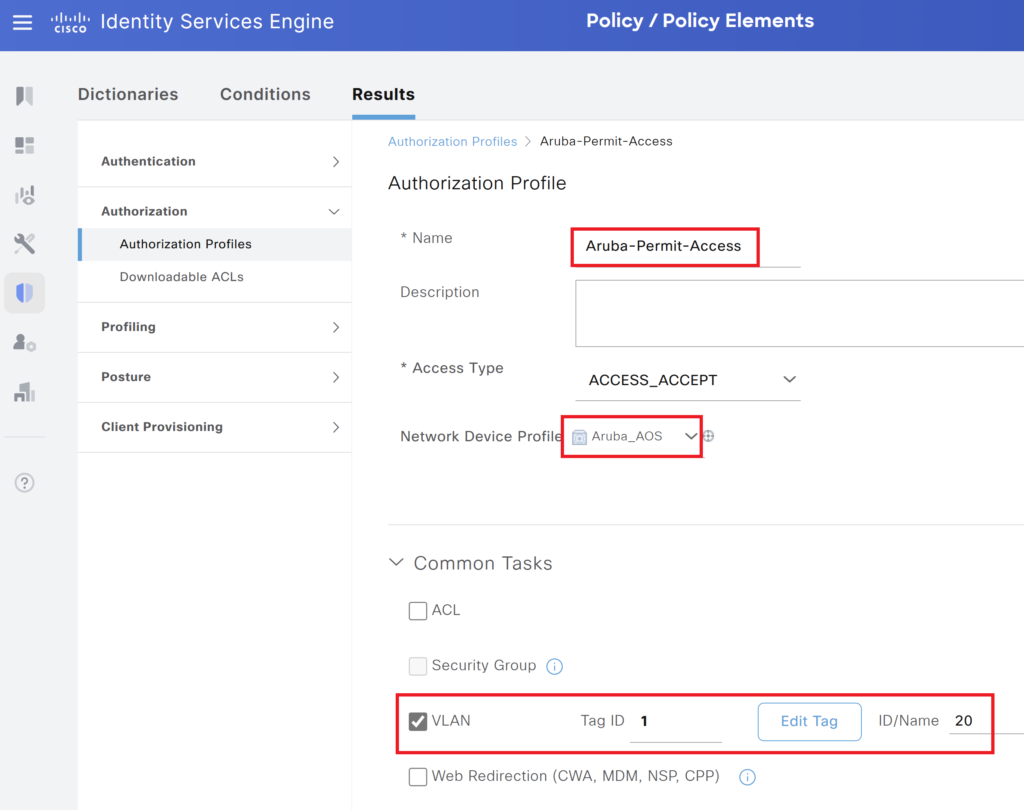
Cisco ISE Aruba Integration – Authorization Profile
Step 3> Configure two authorization profiles, One for Posture unknown, Non-Compliant devices and another for Posture compliant devices.
Ensure to change the Device profile. In the ACL we will type ISE-Posture.
Note: “ISE-Posture” is a profile to be configured on Aruba. It will be used for role-based access.
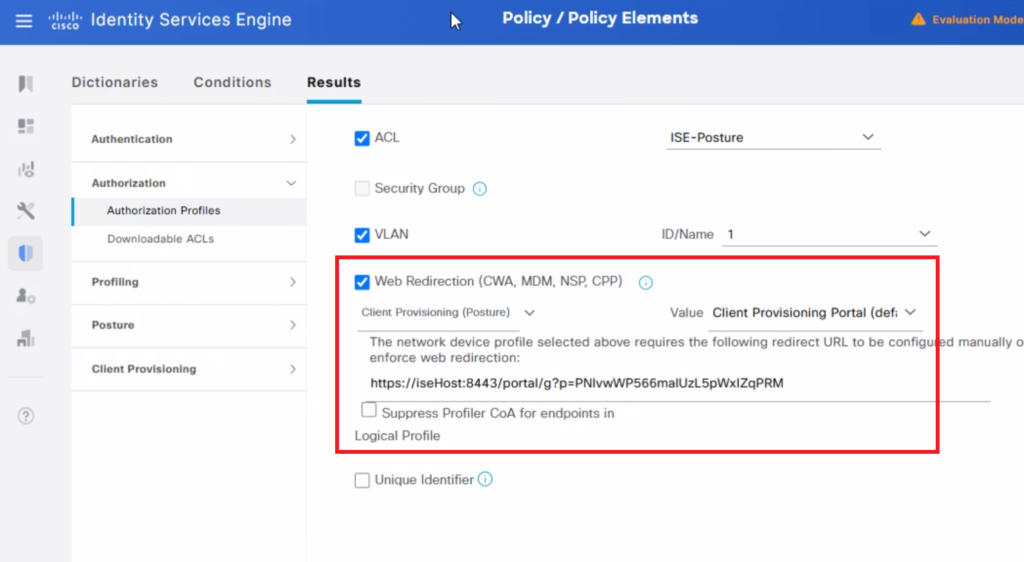
The web redirection will give a URL as below which needs to be configured on Aruba for user redirection.
In the second authorization profile, we will send VLAN information to move the users to the desired VLAN.
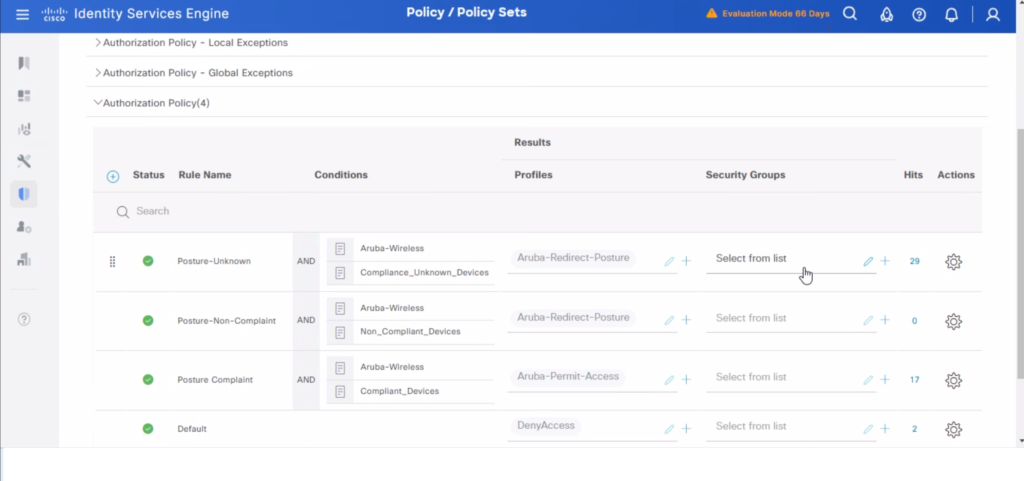
Overall ISE authorization policies are configured as below:
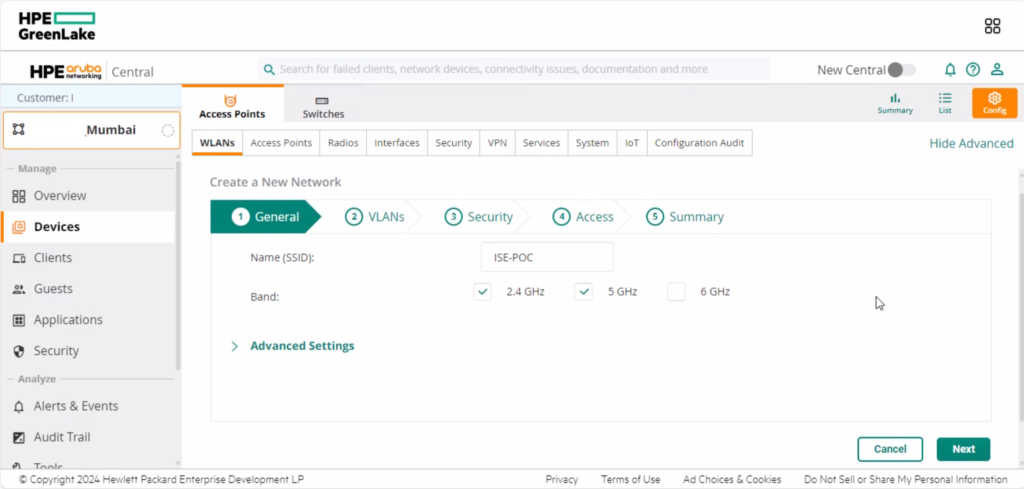
Cisco ISE Aruba Integration – Aruba Configuration
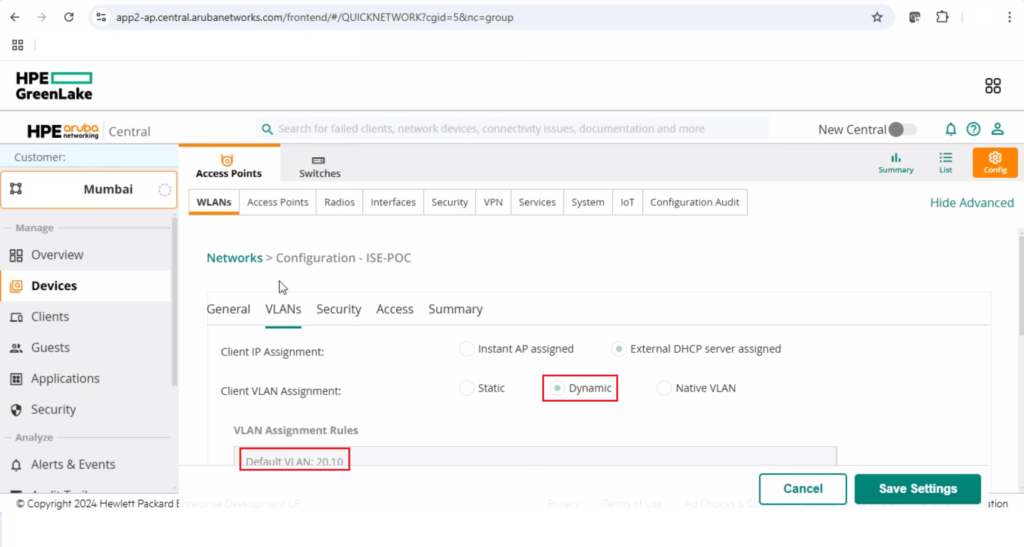
Step 4> Configure SSID on Aruba Central. Name of the SSID ISE-POC
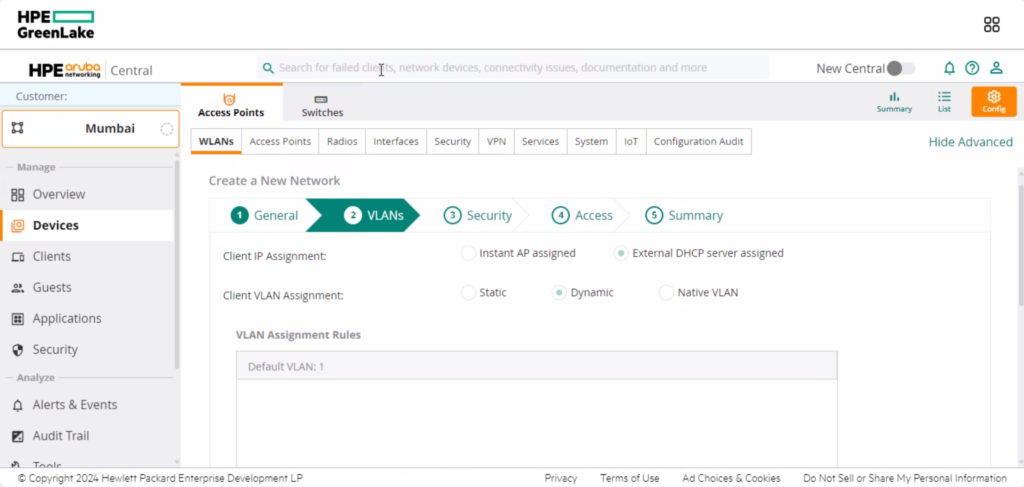
Select dynamic VLAN under client VLAN assignment and VLAN assignment add the desired VLAN for the SSID.
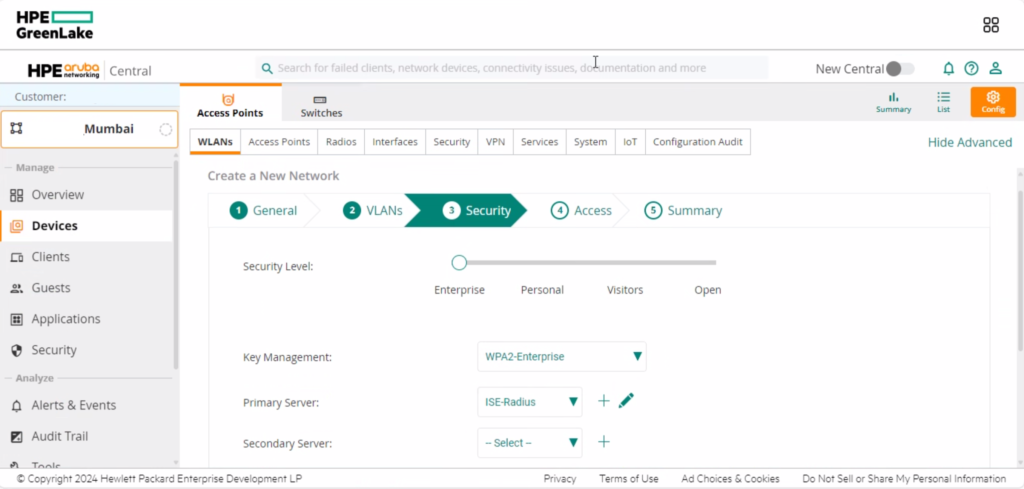
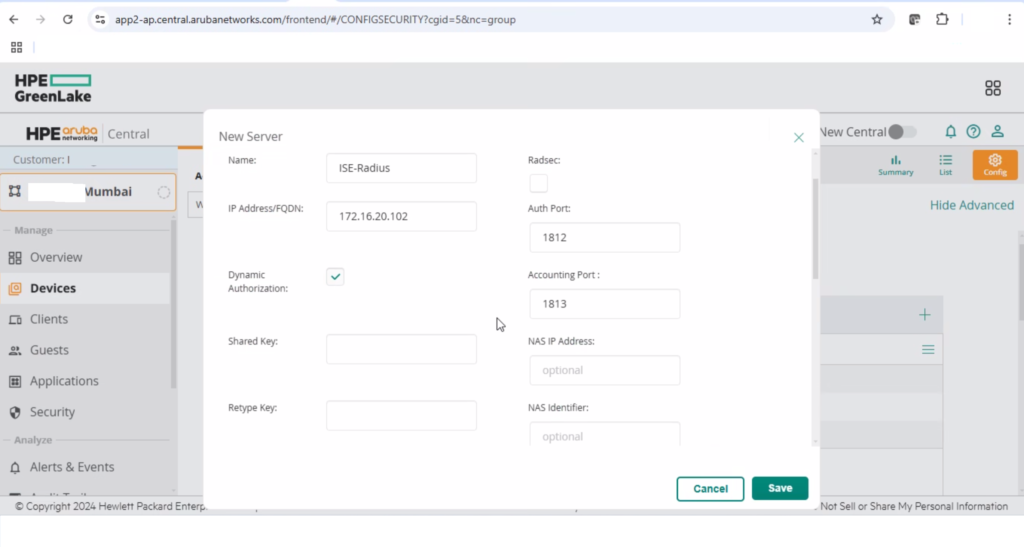
Select WPA2-Enterprise for the key management and define the radius server.
While configuring the RADIUS server ensure to select dynamic authorization, this is required for CoA.
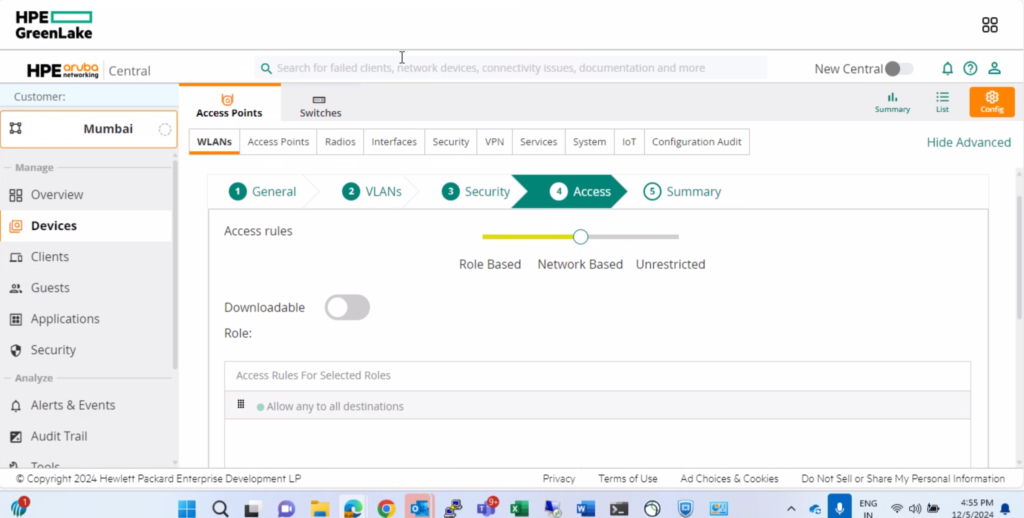
Under the Access Select network based. Once network-based access is selected role-based access is created automatically, the name of the role-based access will be equal to the name of the SSID.
Create an external captive portal that will be used for user redirection. Under the URL paste the value from the ISE authorization profile created in step 3.

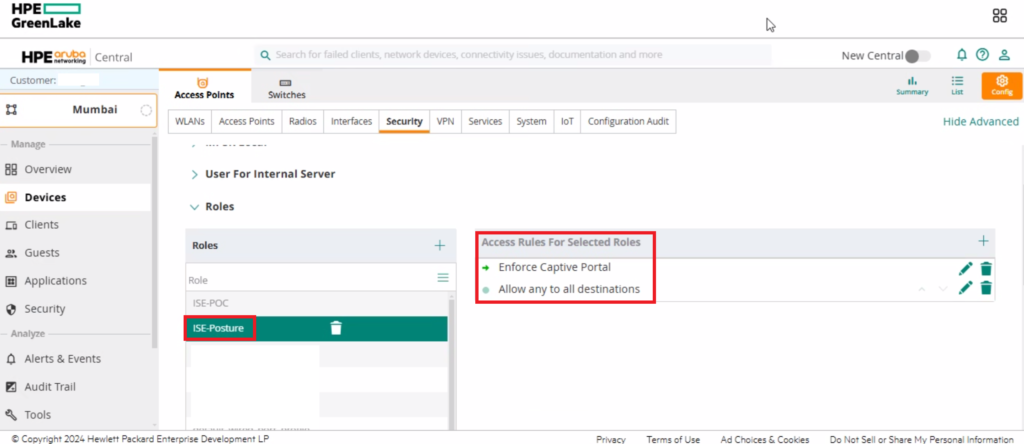
Create a role-based access rule with two entries, first is with enforce captive portal and second with allow to all destination.
Cisco ISE Aruba Integration – Verification
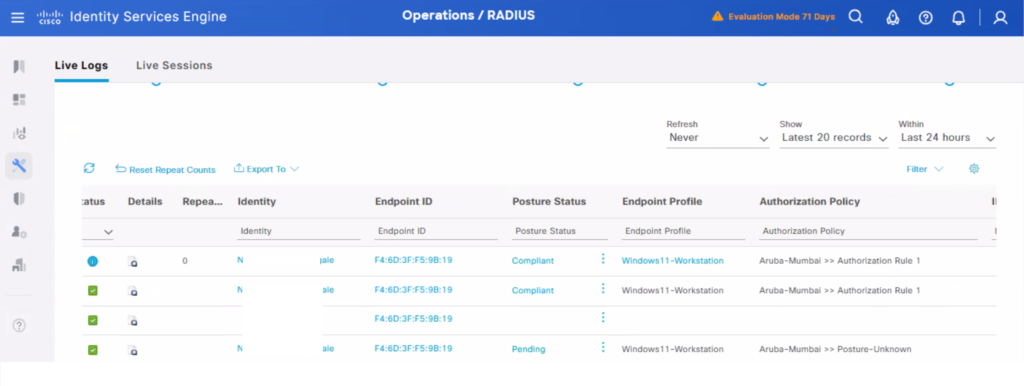
Check Radius Live logs under Cisco ISE to ensure all the correct authorization policies are hitting and CoA is successful.
Cisco ISE Aruba Integration – Troubleshooting
The common problems we would see during the configuration are:
- CoA port UDP 3799 is not enabled from Cisco ISE towards the Aruba Access points.
- The network device profile is not configured properly which would lead to unexpected behavior on the Aruba end whereas on ISE we will observe authentication is successful.
- The configured user role name on ISE under the authorization profile does not match what is configured on the Arube end.
- For dynamic VLAN assignment ensure the port where the Access point is connected is a trunk port.
- If connectivity issues occur or the user machine does not get an IP address, change the SSID to a pre-shared key and confirm that users are getting the correct IP address and proper connectivity; it may not be an ISE issue.
Feel free to comment on what issues you observed during the configuration. We will update the document accordingly.