Cisco ISE (Identity Services Engine) maintains information about the users connected to the network. Cisco and non-Cisco products support Cisco ISE PxGrid integration. One of the use case is to create security policies on network firewalls based on user/group instead of IP-based rules. For this post, we have used ISE 3.3 and FMC 7.4.1.
When a user tries to connect to a network switch or wireless controller the first thing that can happen is the authentication of these users against a Radius server. ISE can act as a Radius server and can authenticate users with the help of various protocols like MAB and 802.1x. Now that ISE is acting as gatekeeper and knows who is in the network and what IP address they carry, sharing this information can give a lot of advantages to other security products.
The Configuration of ISE remains the same regardless of the type of device (Firewall, WSA, Stealth watch, pxgrid2.0 compatible device.) getting integrated with ISE. We need to ensure the ISE pxgrid root CA certificate is present on the peer device and the peer device’s root CA is present on the ISE trusted store.
The integration procedure remains the same with 3rd third-party or internal root CA certificate, The only difference will be importing the root CA certificate on ISE and peer device.
Cisco ISE PxGrid Integration – ISE Config
The integration of ISE and FMC via Pxgrid happens with the help of certificates. ISE authenticates itself to FMC via certificate and vice-versa.
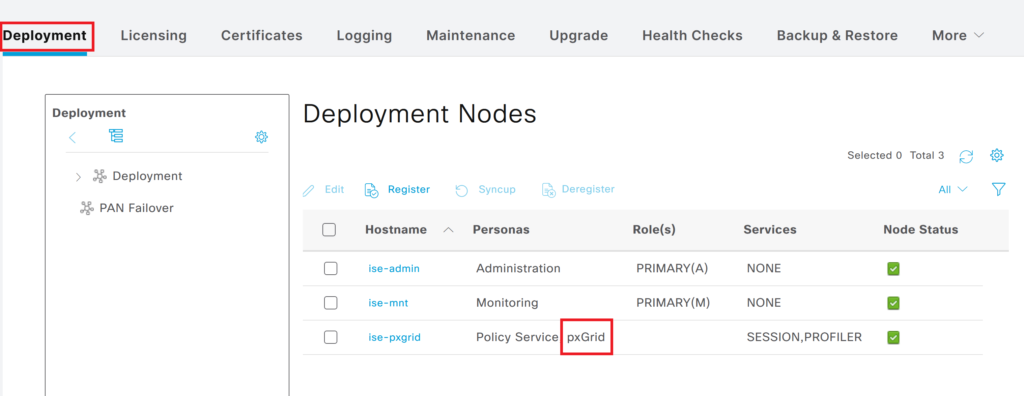
Step 1> Find out the pxgrid node under ISE deployment. In this example, we have taken three node deployments. The ise-pxgrid node has the pxgrid service enabled.
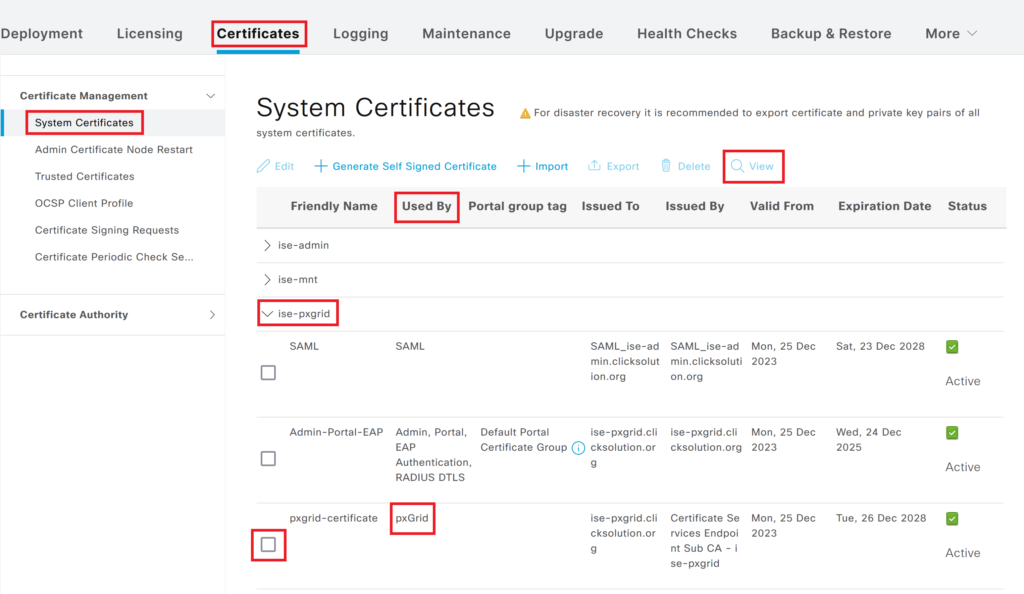
Step 2> Find out Root CA of pxgrid node. Navigate to Administration > System > Certificates and check the pxgrid certificate of the pxgrid node. The certificate used for PxGrid will have pxGrid under the “Used By” column. Select the certificate and click on View.
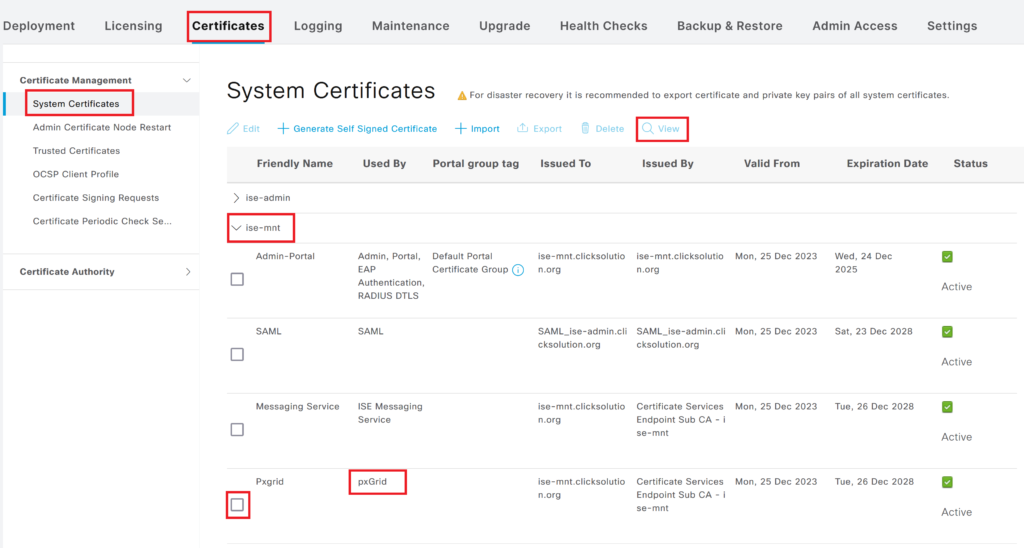
Step 3> Find out Root CA of MNT node. Navigate to Administration > System > Certificates and check the pxgrid certificate of the MNT nodes. The certificate used for pxgrid will have pxGrid under the “Used By” column. Select the certificate and click on View.
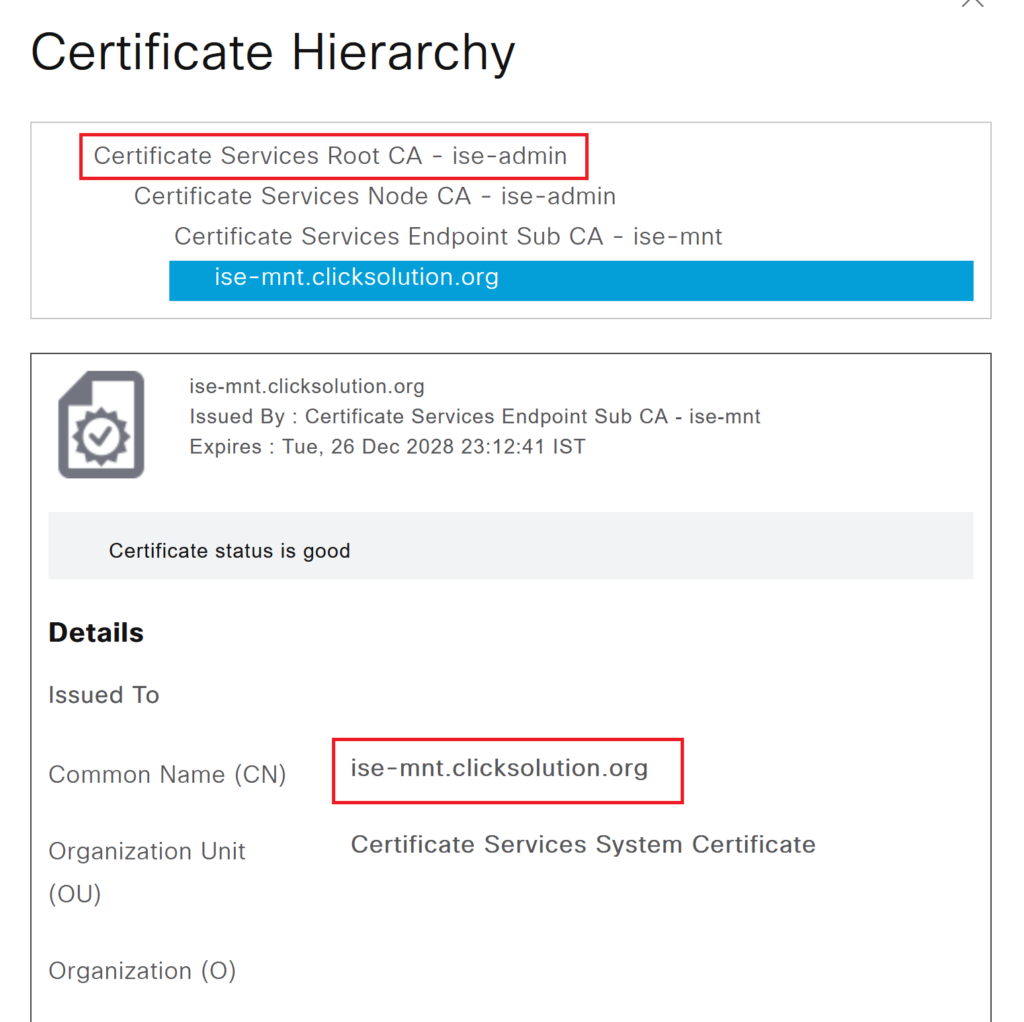
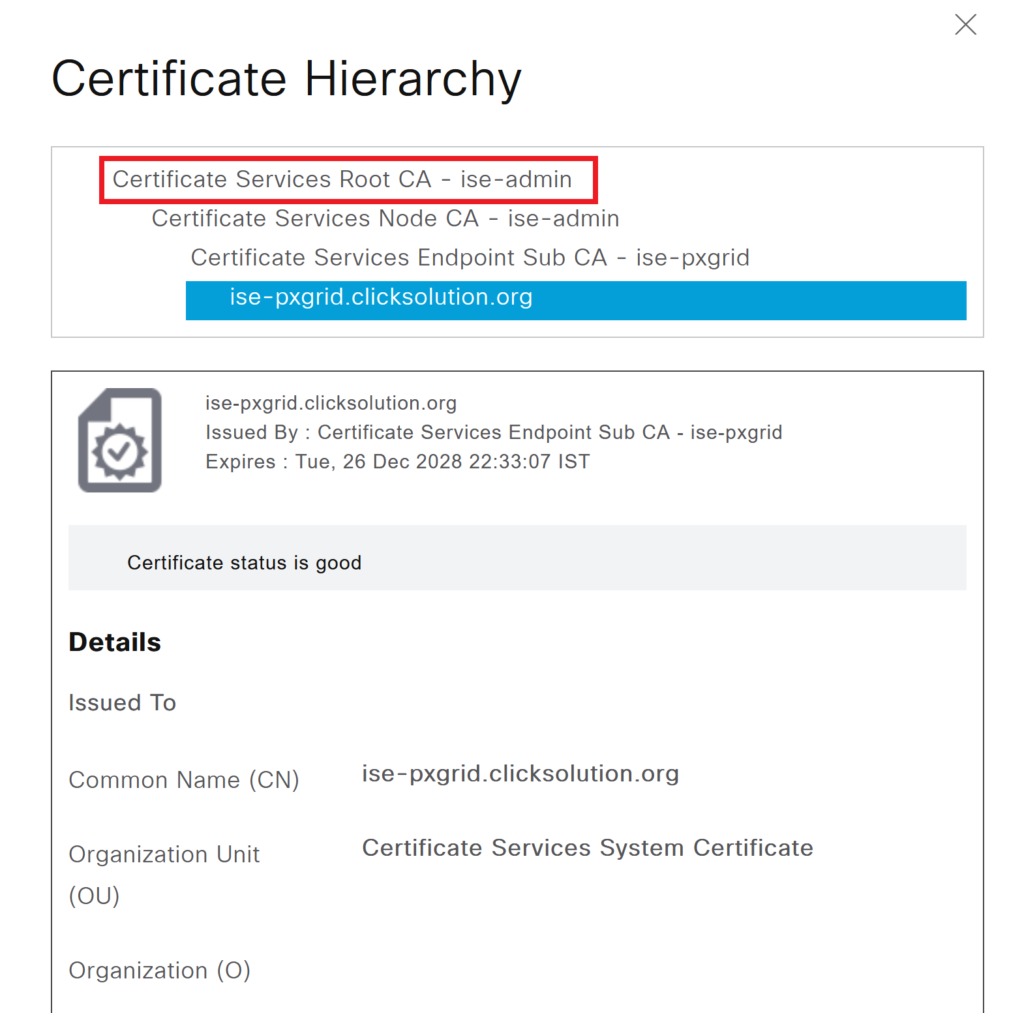
Step 4> We have checked the root CA certificate of the pxgrid certificate of PxGrid and MNT nodes. The Root CA is the same for both nodes in this example.
We need to export the Root CA certificate of the pxgrid certificate. If the certificate is internal CA-signed or 3rd party signed, Root CA is present under the “Trusted Certificate” tab. If the certificate is signed by ISE internal CA then the root CA is present under the Certificate Authority Certificates tab. For this example, we are using an internal CA-signed certificate.
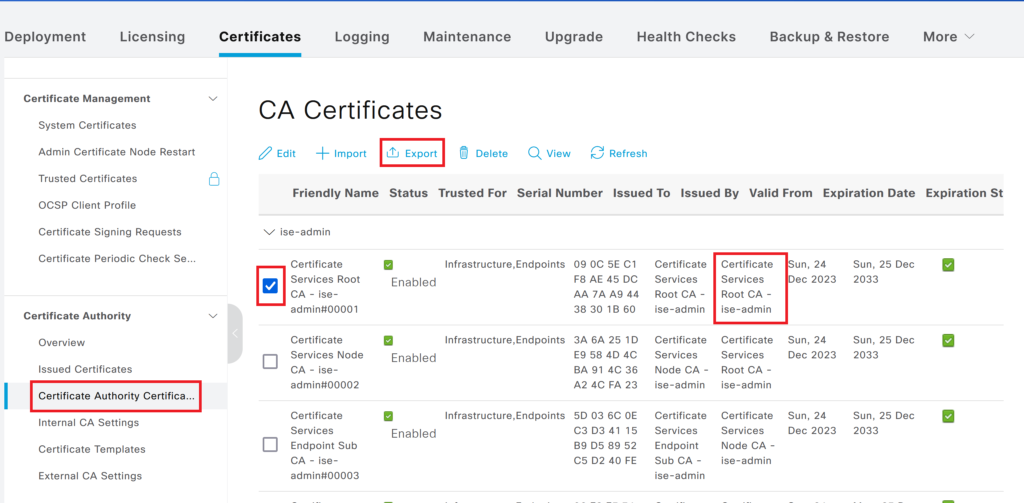
Select the certificate and click on Export. The Certificate used on ISE for pxgrid is below.
Certificate:
    Data:
        Version: 3 (0x2)
        Serial Number:
            09:0c:5e:c1:f8:ae:45:dc:aa:7a:a9:44:38:30:1b:60
        Signature Algorithm: sha384WithRSAEncryption
        Issuer: CN = Certificate Services Root CA - ise-admin
        Validity
            Not Before: Dec 24 15:56:58 2023 GMT
            Not After : Dec 25 15:56:58 2033 GMT
        Subject: CN = Certificate Services Root CA - ise-admin
        Subject Public Key Info:
            Public Key Algorithm: rsaEncryption
                Public-Key: (4096 bit)
                Modulus:
                    00:df:30:d6:7d:83:f1:48:16:5d:4d:ec:85:0a:cc:
                    36:e7:79:72:14:cb:52:8c:2a:41:22:5d:52:a2:41:
                    06:9b:10:21:2a:03:5d:94:67:65:e7:1b:a7:f1:d3:
                    3a:93:c6:8d:23:79:98:55:36:56:b7:cd:f5:0f:55:
                    4c:c0:21:25:3b:6c:fe:d0:c5:db:c3:5e:5f:44:ca:
                    df:c5:49:31:78:78:7f:7a:9f:e8:d8:b0:a9:67:db:
                    da:04:81:83:42:93:51:50:72:4c:08:9b:62:ed:ac:
                    18:2a:23
                Exponent: 65537 (0x10001)
        X509v3 extensions:
            X509v3 Subject Key Identifier:
                FD:D7:71:8F:92:08:72:3F:49:A0:73:AB:B3:4C:35:E0:1A:2B:9A:11
            X509v3 Key Usage: critical
                Certificate Sign
            X509v3 Basic Constraints: critical
                CA:TRUE
    Signature Algorithm: sha384WithRSAEncryption
    Signature Value:
        97:c8:e0:ae:33:b1:93:88:88:da:5b:59:98:b7:fb:7b:67:21:
        bf:1f:ce:c4:8c:a3:f7:9b:3c:93:51:ff:c9:dd:11:e9:8f:fc:
        d2:17:ac:ca:1f:7c:1d:56:bc:19:99:ec:b9:29:5e:ed:7e:e4:
        7d:a5:d8:a6:fb:6c:c9:65:53:81:d5:cb:1f:da:e9:27:49:9c:
        e4:a2:76:27:bb:35:0f:74:8d:39:0b:60:e9:15:40:6a:8f:82:
        df:8d:95:cf:da:57:58:13:5b:60:8f:c3:c0:89:44:0d:60:82:
        32:fc:87:e2:ba:61:b3:35:47:df:aa:47:5a:14:f0:f6:8f:2f:
        d3:a4:f9:5d:dd:be:d0:90:9c:7d:ba:d3:a4:93:9f:a3:c1:02:
        56:b7:a9:0e:aa:27:34:5f:67:48:91:9f:c7:5e:76:69:7e:01:
        81:5d:74:41:57:4f:24:c9
Step 5> Generate a certificate for FMC:
FMC also needs a certificate for itself to authenticate itself to ISE. Generate the certificate from ISE or obtain it from Internal CA.
Option: To Generate a certificate from ISE:
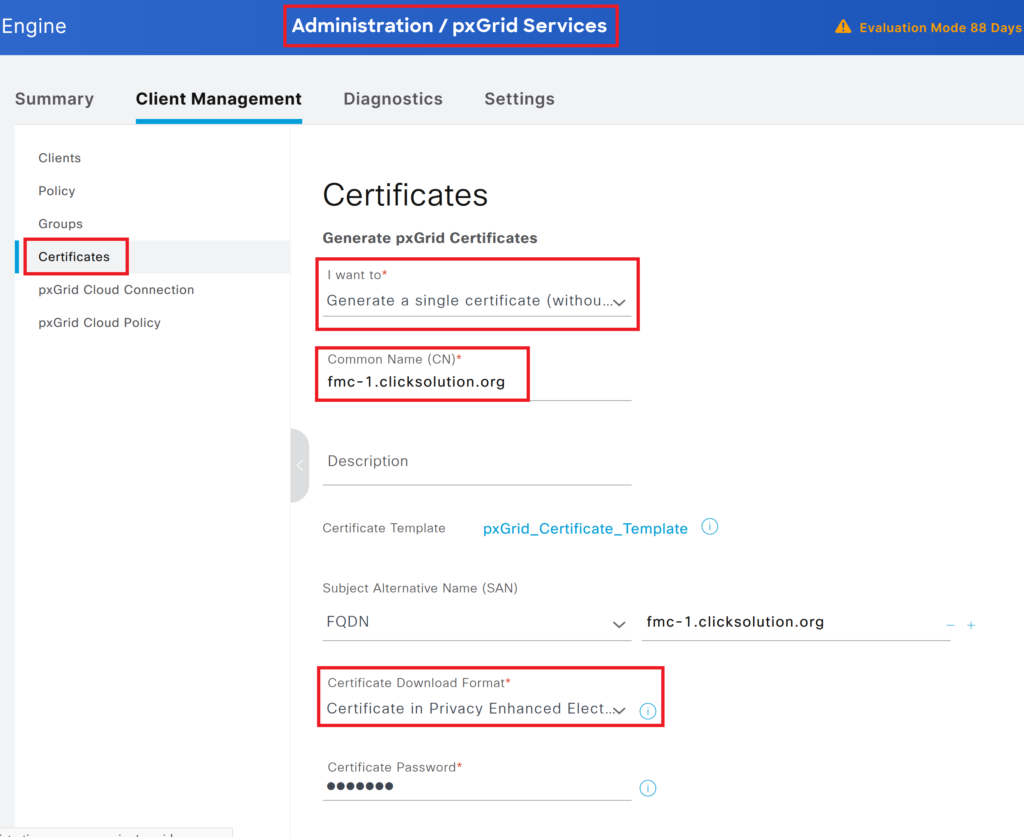
We will use an internal CA-signed pxgrid certificate on FMC. Below is the certificate used on FMC.
Certificate:
Data:
Version: 3 (0x2)
Serial Number:
2b:de:97:a0:fc:80:4f:19:a2:dc:c3:78:bb:c7:8d:ba
Signature Algorithm: sha256WithRSAEncryption
Issuer: CN = Certificate Services Endpoint Sub CA - ise-admin
Validity
Not Before: Dec 26 05:59:33 2023 GMT
Not After : Dec 26 05:59:33 2025 GMT
Subject: CN = fmc-1.clicksolution.org
Subject Public Key Info:
Public Key Algorithm: rsaEncryption
Public-Key: (2048 bit)
Modulus:
00:ac:61:5c:c2:22:f5:91:3a:a8:68:a7:7b:78:62:
09:cd:b1:02:61:22:1a:3e:cf:63:a1:0f:40:63:5f:
c8:e8:18:2b:8e:86:95:b2:e2:4f:54:3e:44:81:ba:
cb:16:ae:ee:47:92:6d:f5:bb:89:80:eb:cf:cd:6d:
8d:62:31:cc:57:08:07:be:53:79:ab:db:df:af:9f:
2a:c3
Exponent: 65537 (0x10001)
X509v3 extensions:
X509v3 Subject Alternative Name: critical
DNS:fmc-1.clicksolution.org
1.3.6.1.4.1.9.21.2.5:
..pxGrid_Certificate_Template
X509v3 Authority Key Identifier:
keyid:F4:BA:F9:59:2F:1D:F9:AF:BE:9F:41:62:DF:25:22:40:33:24:BE:89
DirName:/CN=Certificate Services Node CA - ise-admin
serial:5D:03:6C:0E:C3:D3:41:15:B9:D5:89:52:C5:D2:40:FE
X509v3 Subject Key Identifier:
83:7D:2A:FC:D4:FE:3E:A0:A5:F7:44:44:98:50:C5:58:7E:3F:F6:A0
X509v3 Key Usage: critical
Digital Signature, Non Repudiation, Key Encipherment
X509v3 Extended Key Usage: critical
TLS Web Server Authentication, TLS Web Client Authentication
X509v3 Basic Constraints: critical
CA:FALSE
Signature Algorithm: sha256WithRSAEncryption
Signature Value:
b5:79:c0:88:f6:58:7e:99:59:85:73:4c:c1:ea:5c:ca:07:70:
67:ce:9f:86:c7:9a:7e:d8:1a:d3:68:92:c6:0f:19:a4:40:7b:
7a:be:a1:47:4f:f9:81:09:4d:b3:61:28:04:e1:f6:99:b6:e9:
ec:17:e7:bc:da:22:98:d0:03:cf:90:59:cb:20:e5:97:02:0e:
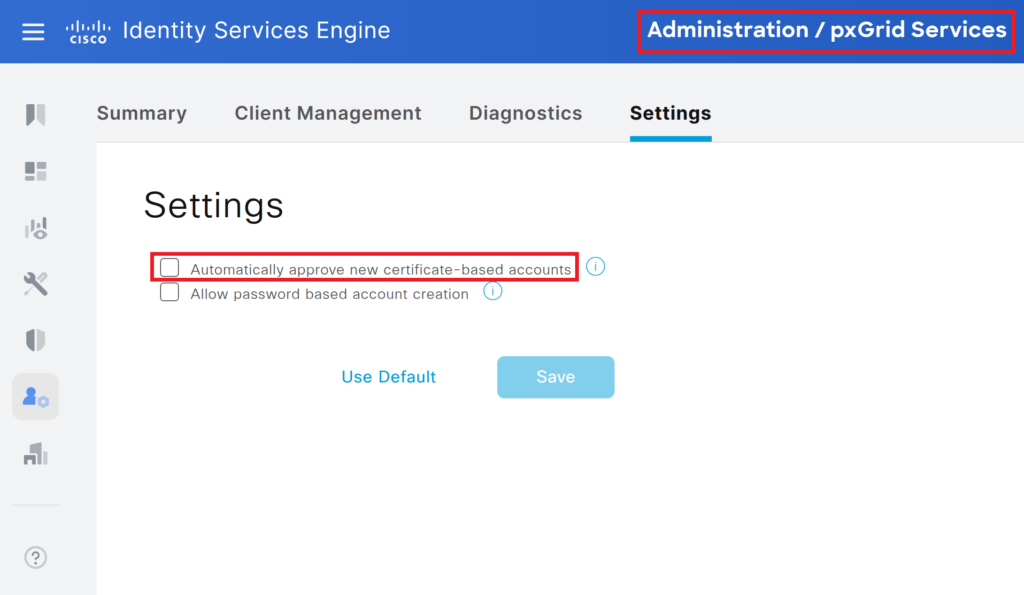
4a:ba:13:20:73:a2:6d:6aStep 6> Enable automatic approval of account. This step is optional, approval can be done manually.
Cisco ISE PxGrid Integration – FMC Config
Step 7> Import the root CA of ISE pxgrid on the FMC trusted certificate.
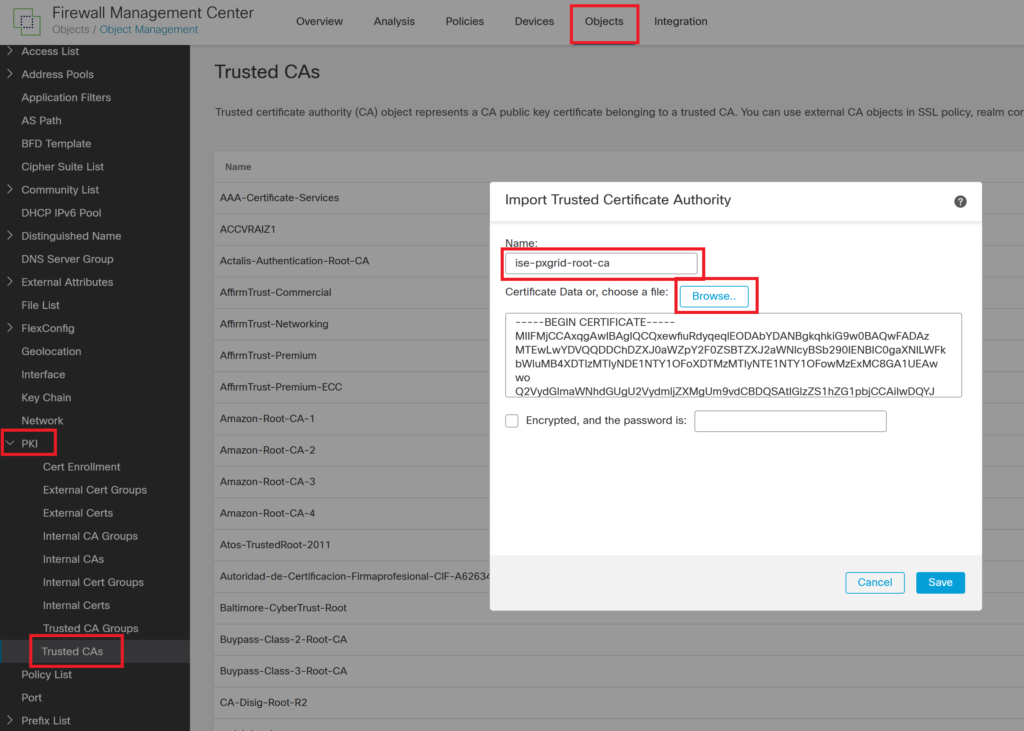
Step 8> Import MNT pxgrid certificate root CA certificate on FMC. In this example, we are using the ISE internal root CA certificate so the pxgrid certificate of all nodes will be signed from the same root CA.
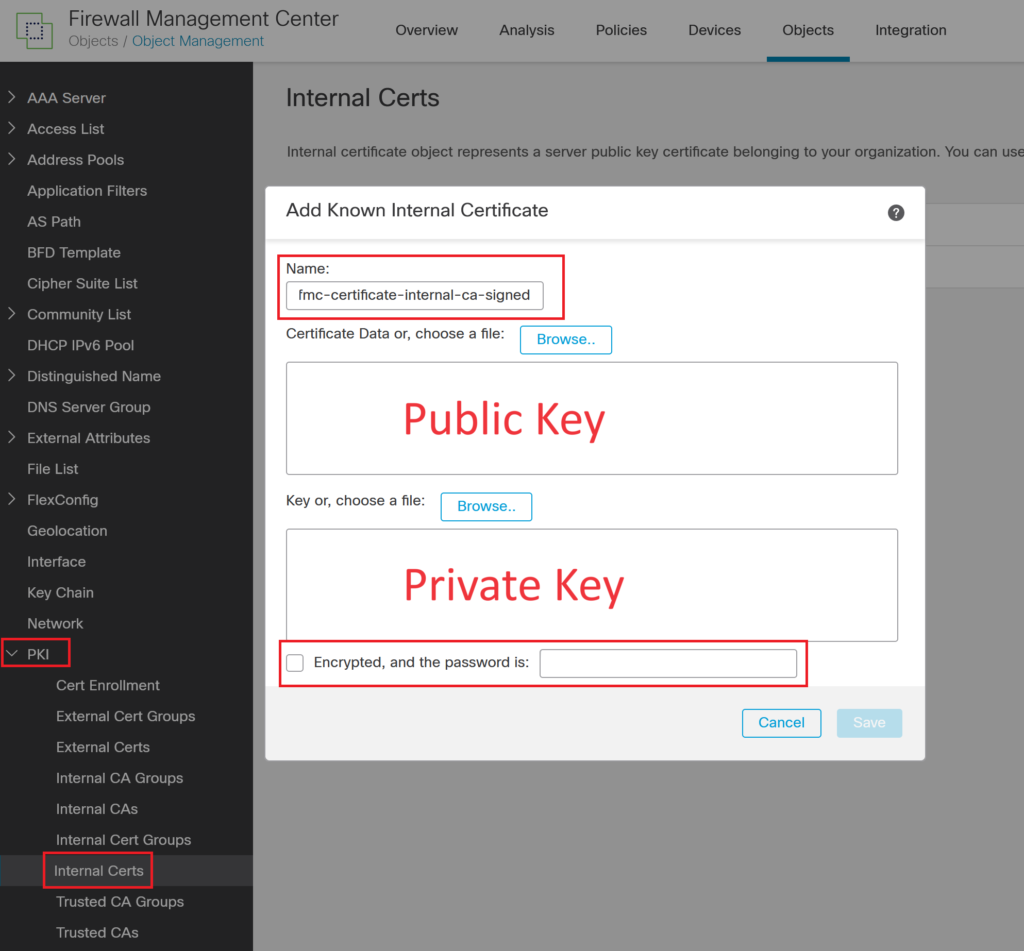
Step 9> Import the FMC certificate generated in the previous step:
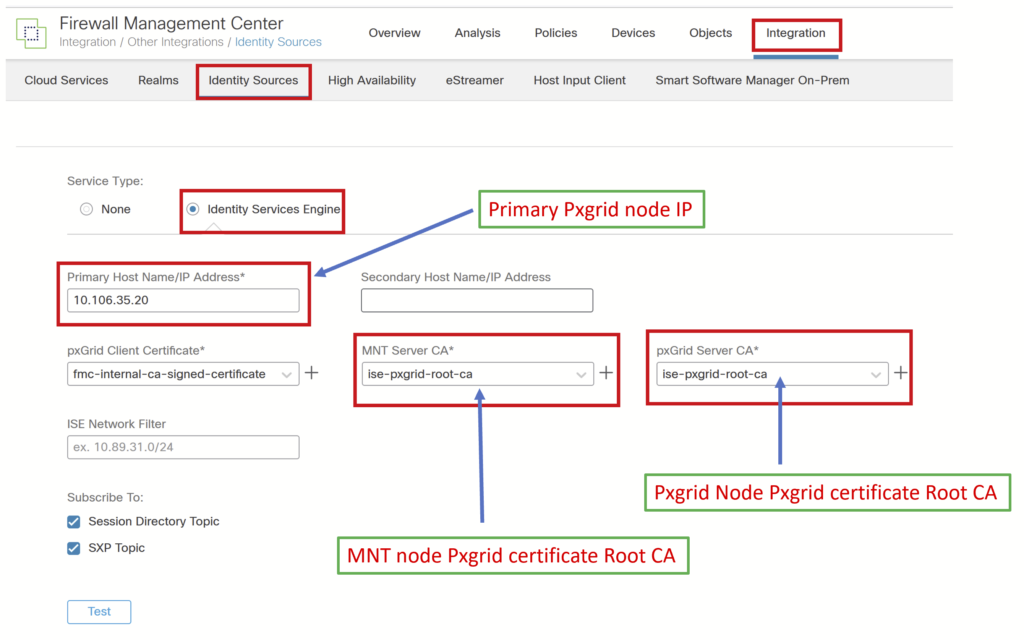
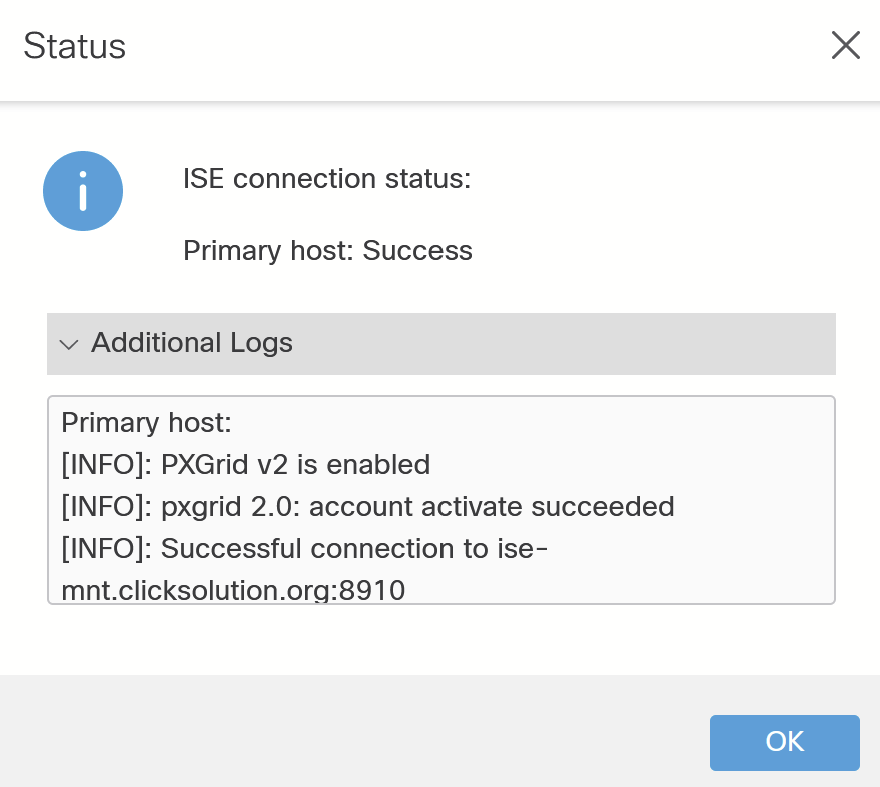
Step 10> Ensure FMC can perform forward and reverse lookup of ISE FQDN, IP address. Navigate to Integration > Identity Sources, and Enter the details as shown in the screenshot. Save the configuration and click on Test.
Cisco ISE PxGrid Integration – Validation
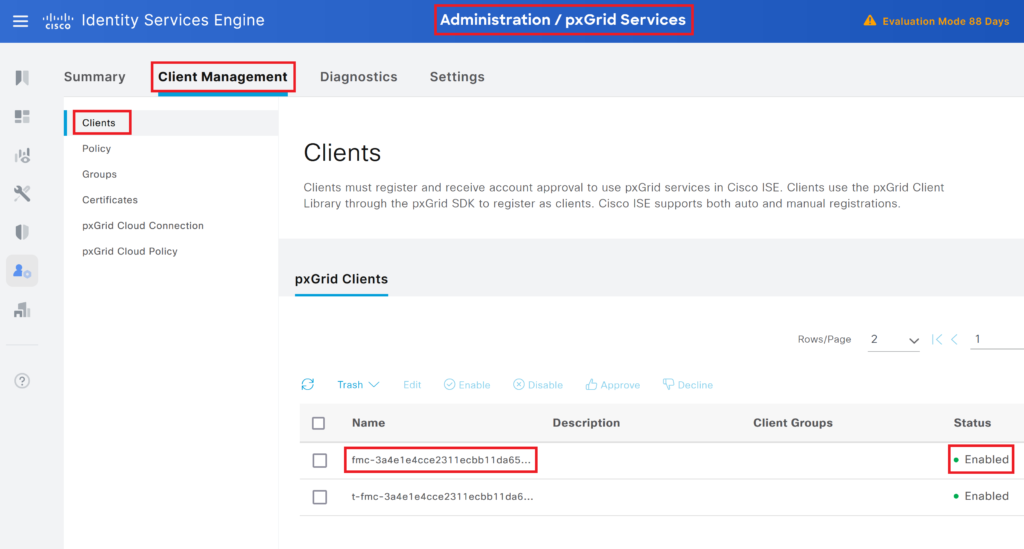
Step 11> Navigate to Cisco ISE Administration > pxGrid Services > Client management > Client. FMC is shown enabled.
For other post related to ISE visit blog. For official document visit Cisco website.