When a machine tries to connect to an 802.1x-enabled wired or wireless network, it must have Windows dot 1x authentication settings enabled. The user or machine, or both, can authenticate using the given setting.
You can configure the wired auto-config or wireless auto-config locally on a system or push via Group policy. In this post, we will cover the local configuration process for both wired and wireless NIC.
A radius server is needed to enable network access control using .1x authentication.
Cisco ISE is one of the well-known RADIUS servers.
Wired Windows dot 1x authentication – Enable Wired Service
Step 1> We need to enable wired dot1x service on the PC. Go to run and type services.msc and hit enter.

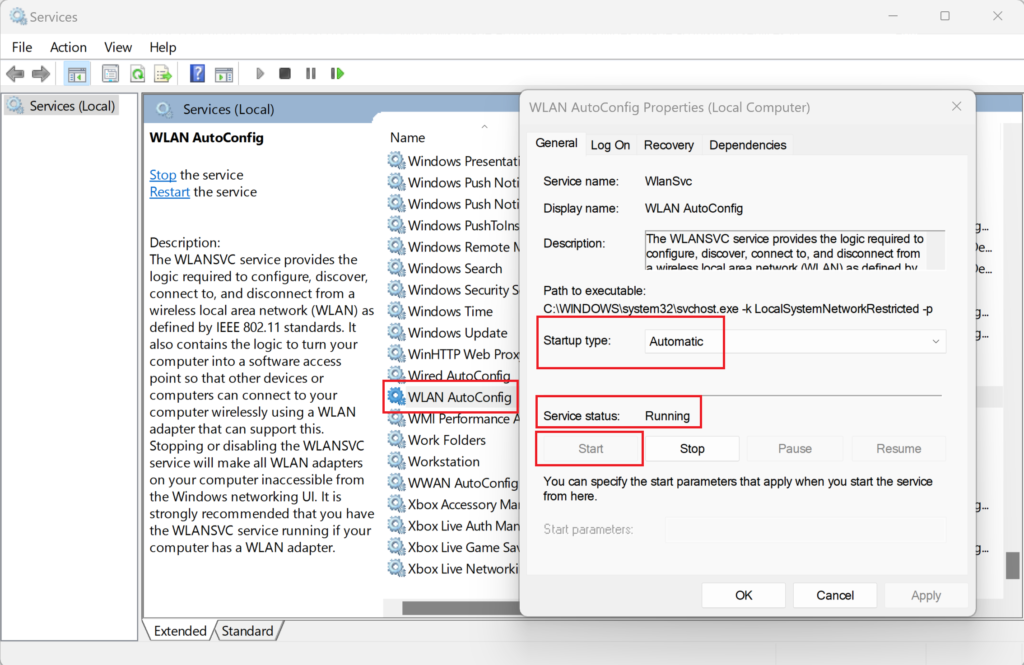
Double-click on wired auto-config and change the startup type to automatic.
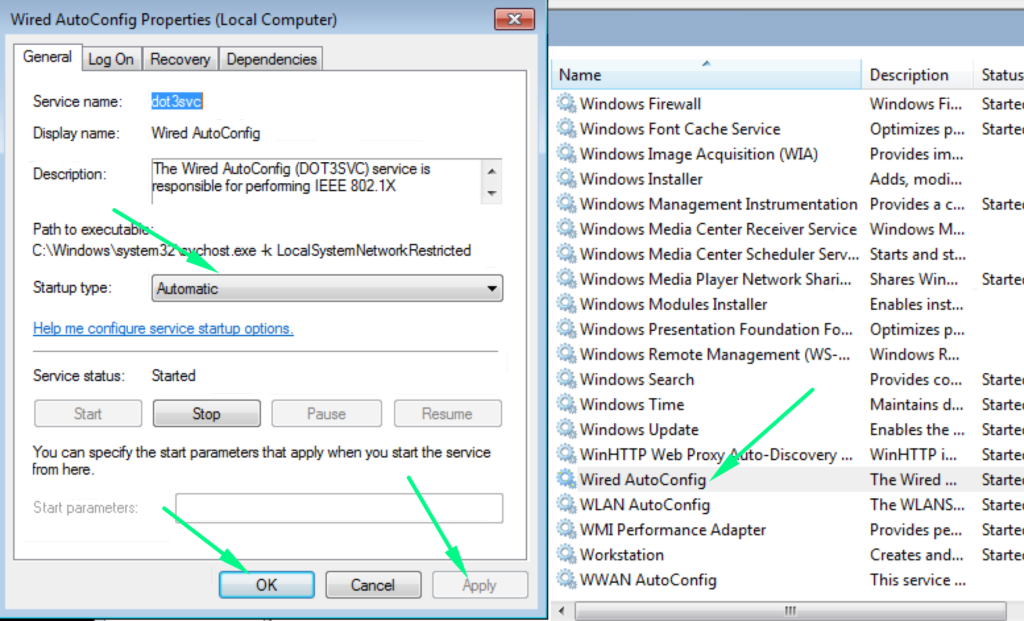
Now once the wired AutoConfig service is started the device starts responding to 802.1x protocol messages. Under the network interface card, a new tab authentication starts appearing.
Wired Windows dot 1x authentication – Wired NIC Setting
Step 2> Now we will configure the Network interface card for 802.1x authentication.
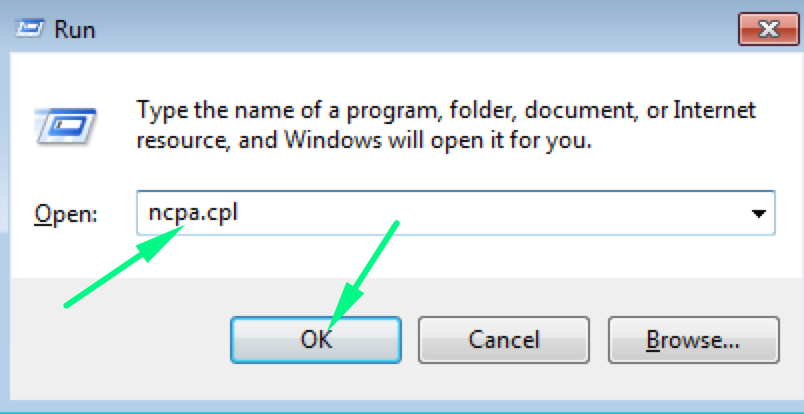
Go to run and type ncpa.cpl and hit enter.
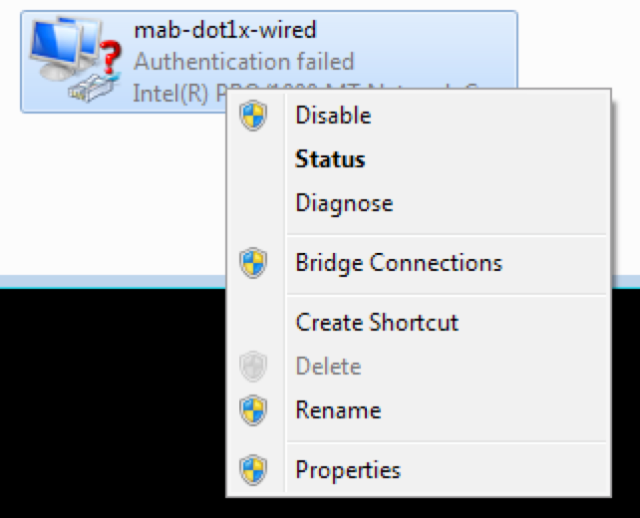
Right-click on the wired NIC and click on properties.
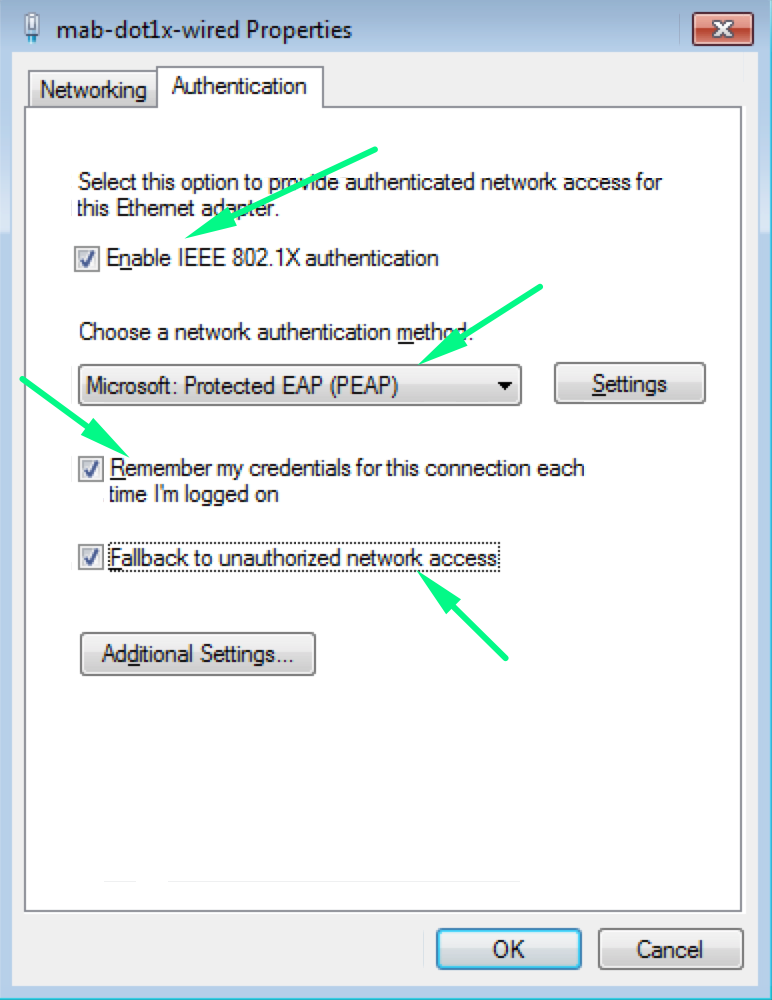
A new authentication tab will start appearing. Select Enable IEEE 802.1x Authentication. There are various authentication methods which can be selected. PEAP, EAP-TLS etc. For this post, we have used EAP (PEAP)
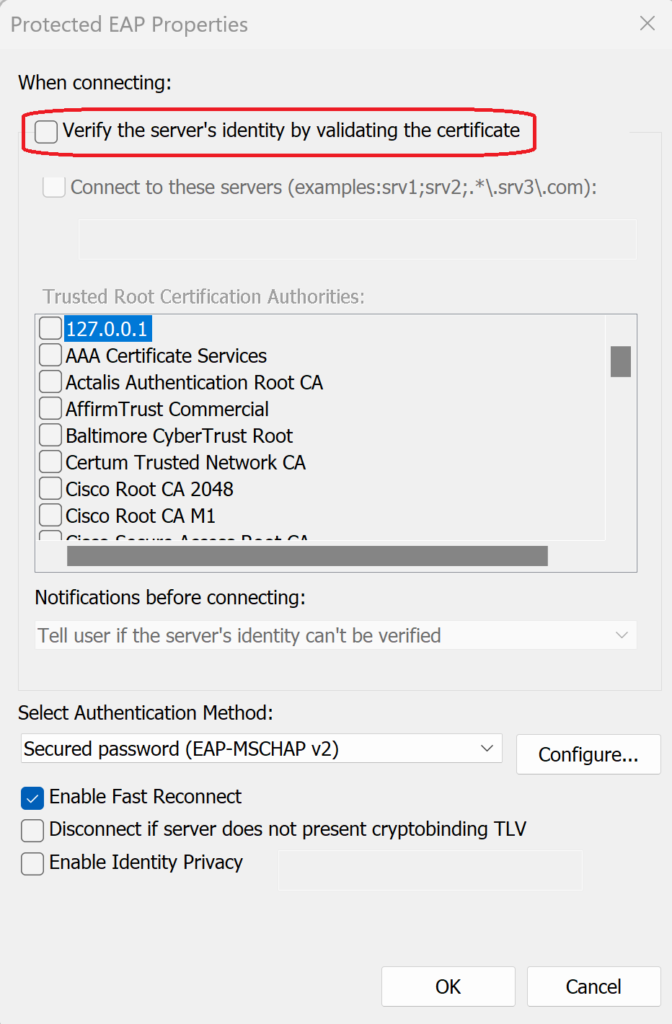
Click on Setting next to the authentication method. The endpoint verifies the Radius server’s identity by validating its certificate. If the certificate is not trusted, un-select verifies the server’s identity by validating the certificate.
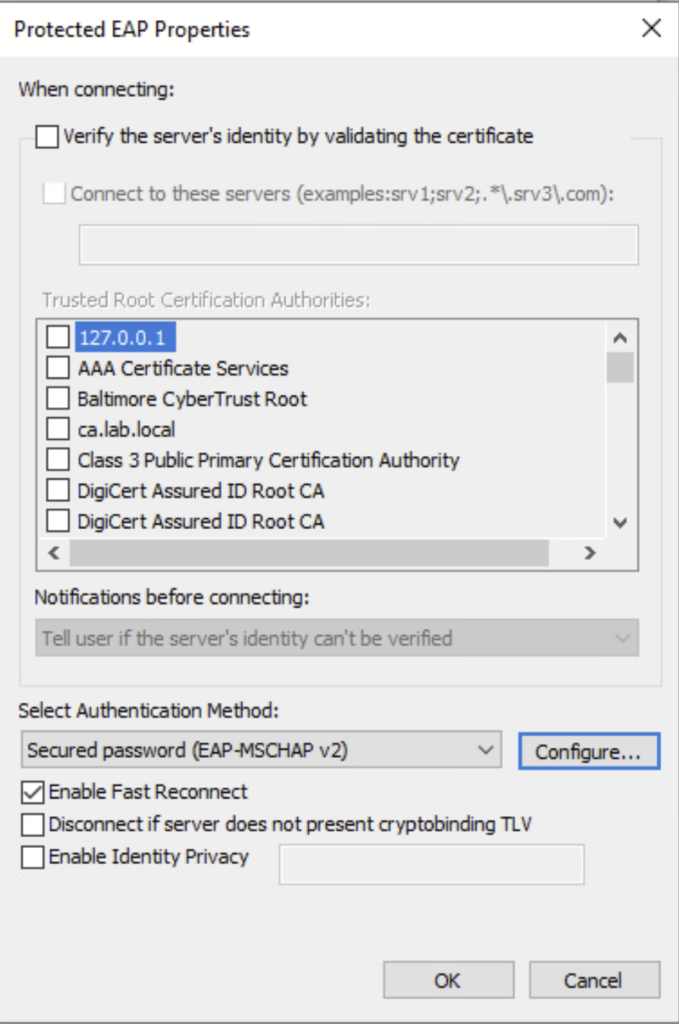
Select the authentication method as EAP-MSCHAP v2, click configure, and select automatically use my Windows logon name and password.

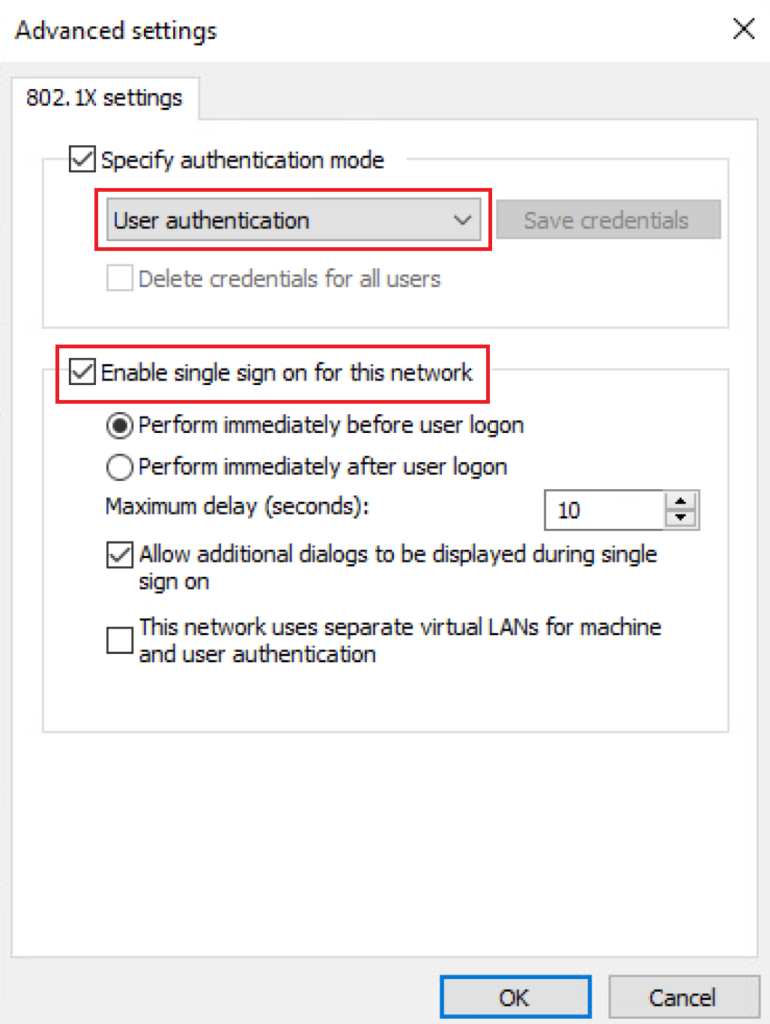
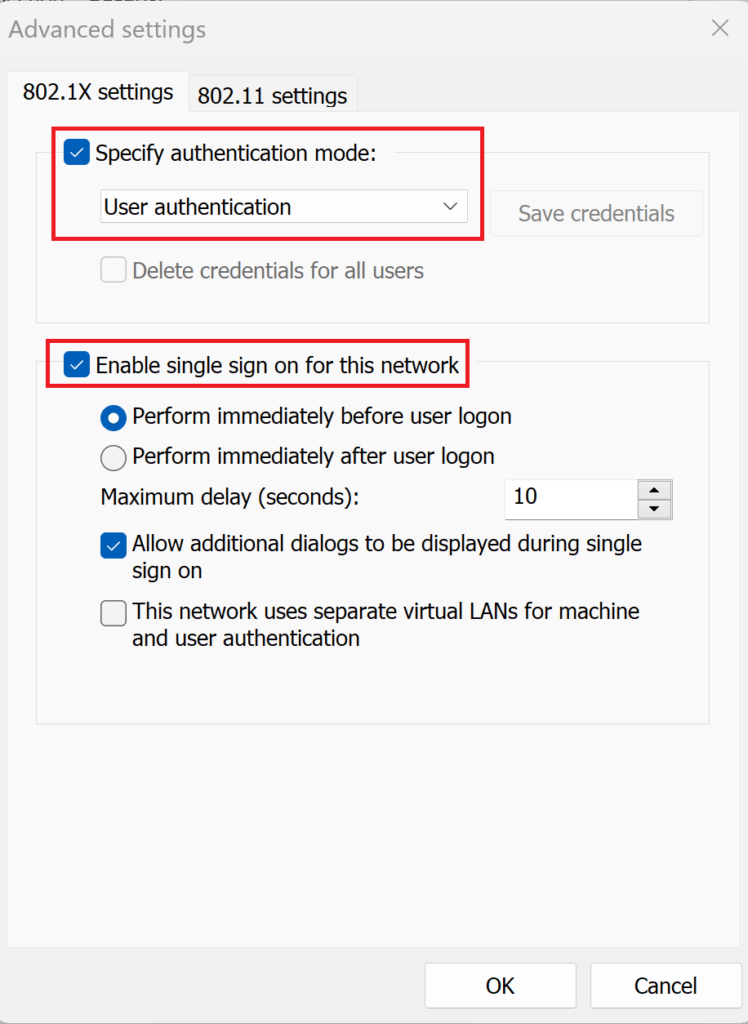
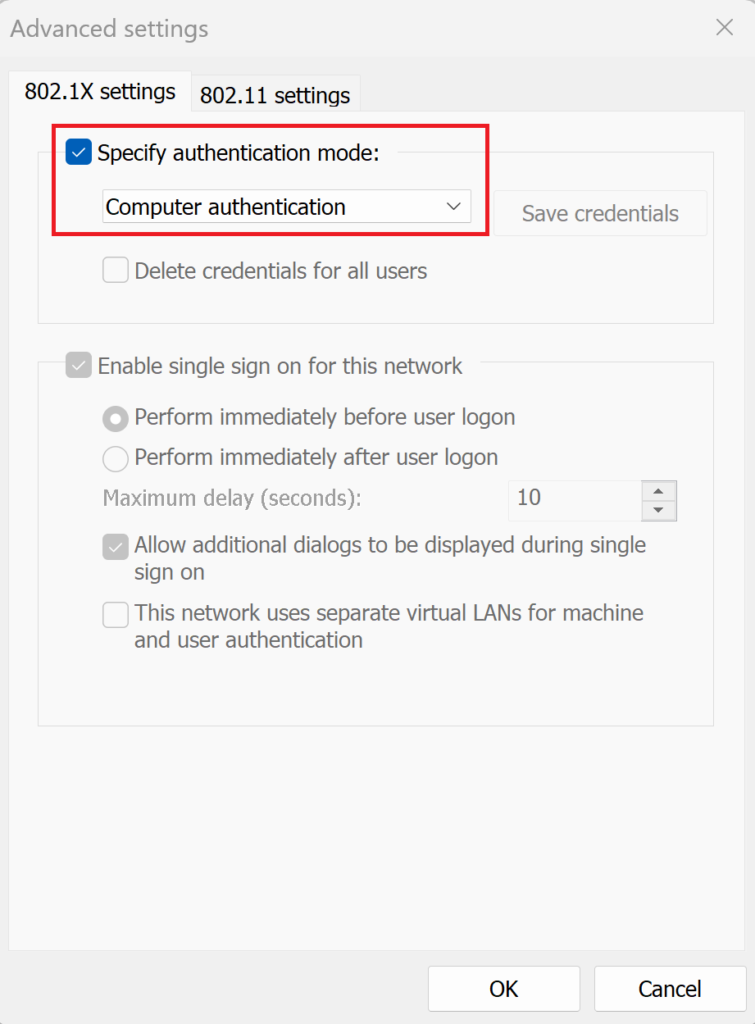
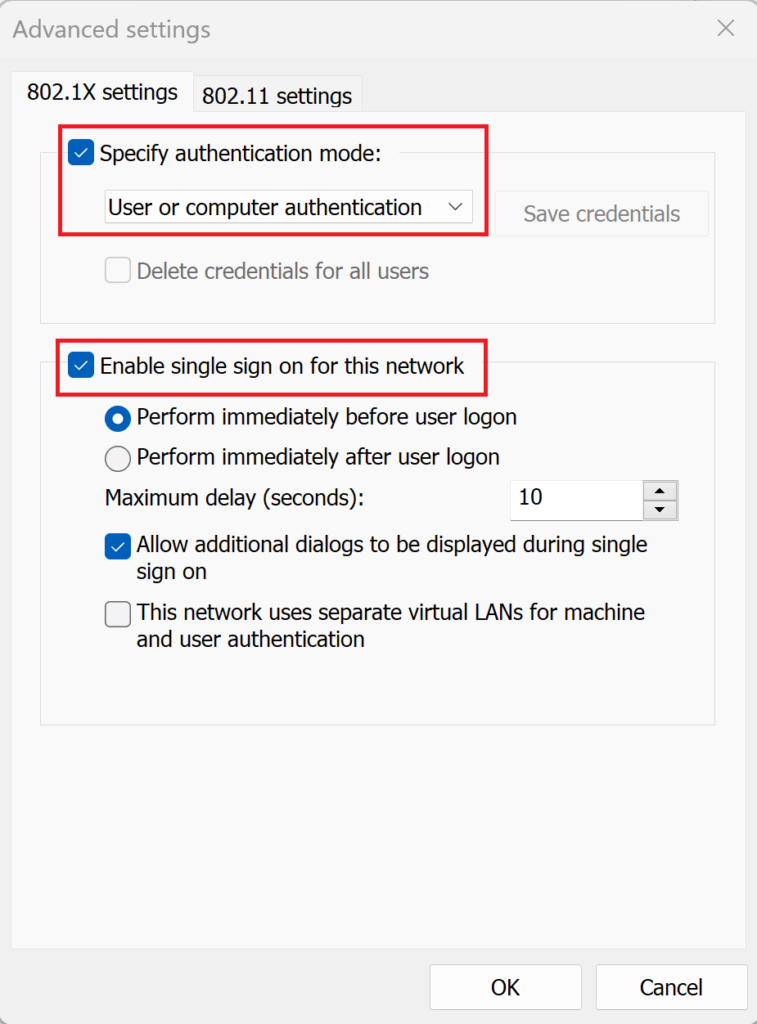
Click OK and then click on Additional settings. Under Specify authentication mode, we can select based on what we want to do.
User authentication only
1> For User authentication only, select user authentication from the drop-down.
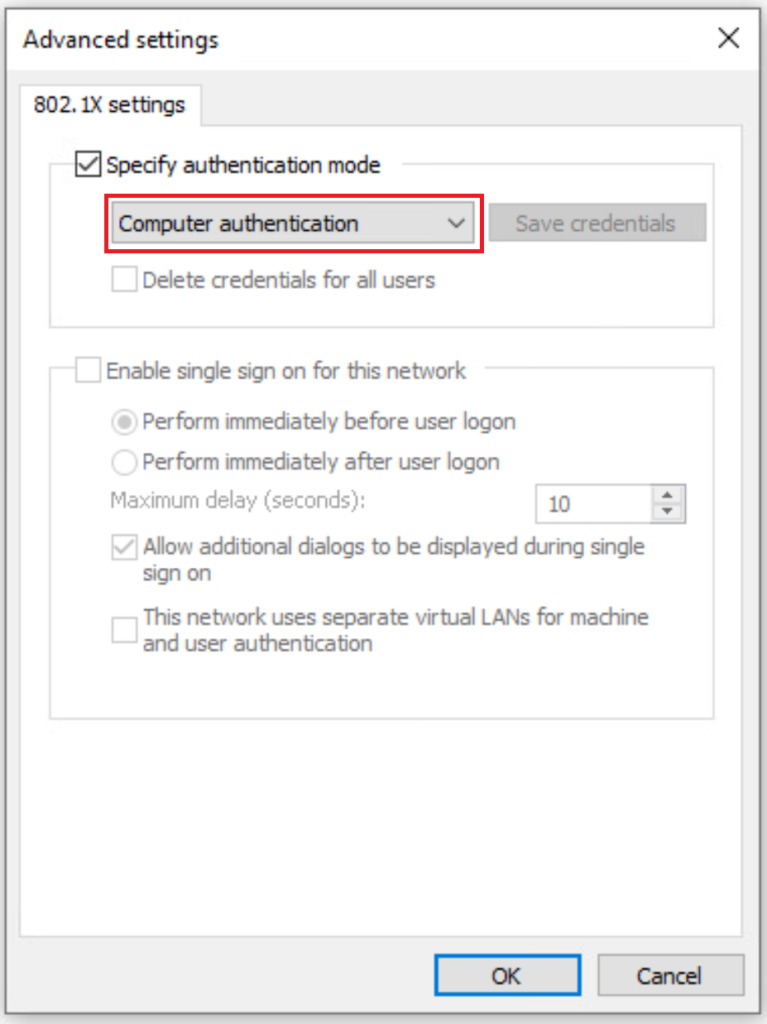
Computer/Machine authentication Only:
2> For Computer Authentication only, select computer authentication from the drop-down. Computer authentication ensures valid machines are connecting to the network.
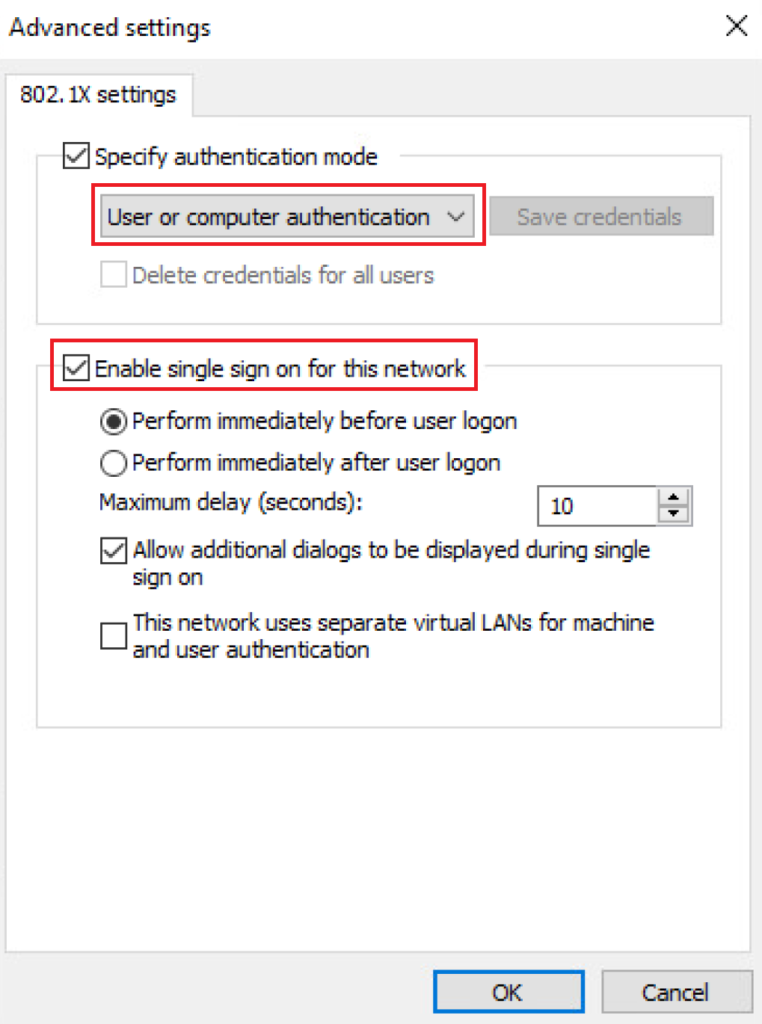
User or Computer/Machine Authentication Only
3> For User or computer authentication, select user or computer authentication from the drop-down
Wireless Windows dot 1x authentication – Enable Wireless Service
Step 1> We need to enable wireless dot1x service on the PC. Go to run and type services.msc and hit enter.
Enable WLAN AutoConfig Service
Wireless Windows dot 1x authentication – Wireless SSID Config
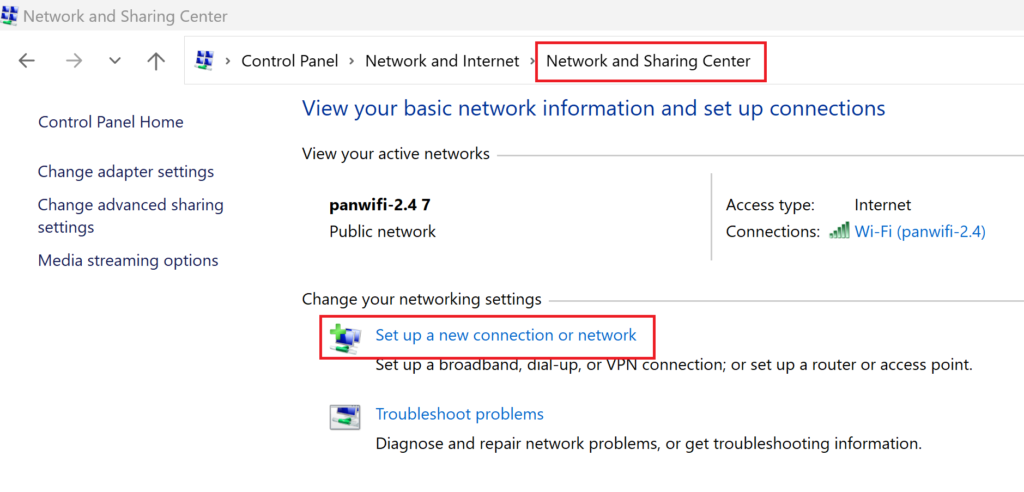
Once the WLAN AutoConfig is running we can configure SSID for 802.1x authentication.
Step 2> Open the network and sharing center and click on Set up a new connection or network:
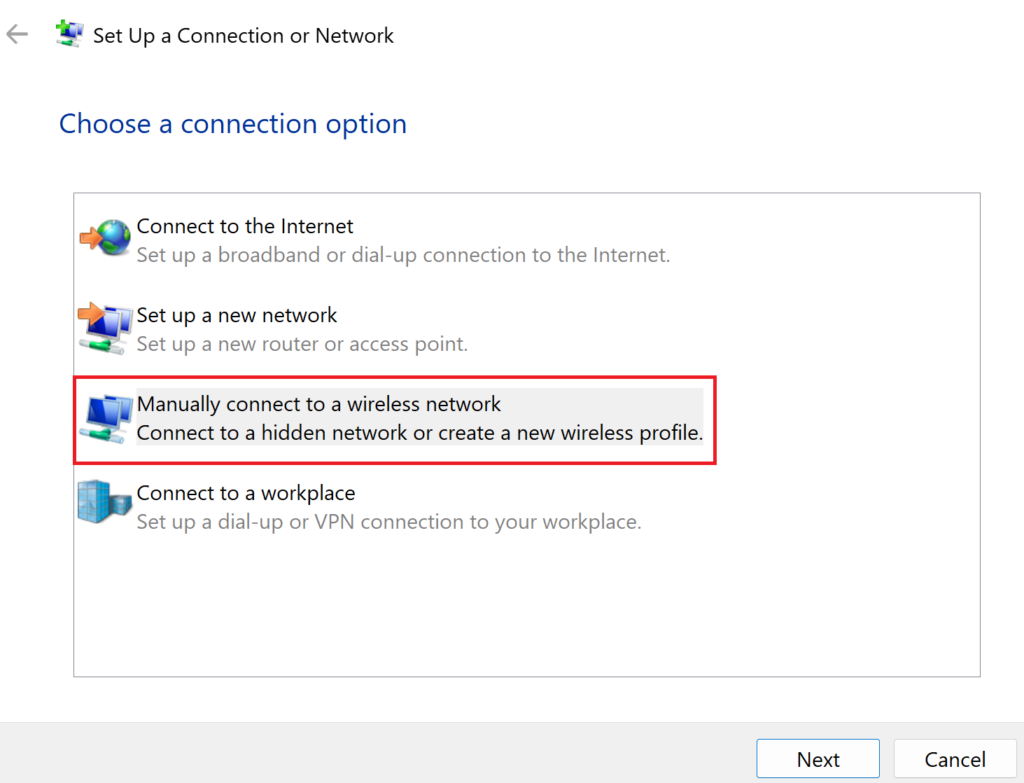
Select manually connect to a wireless network:
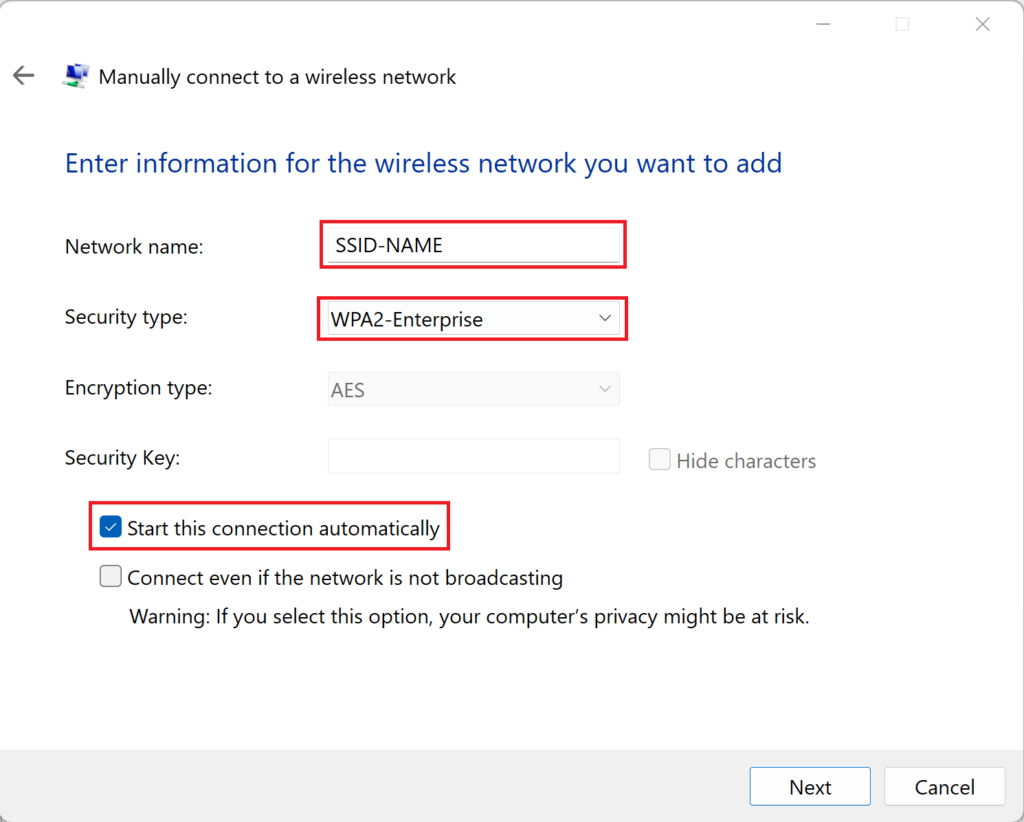
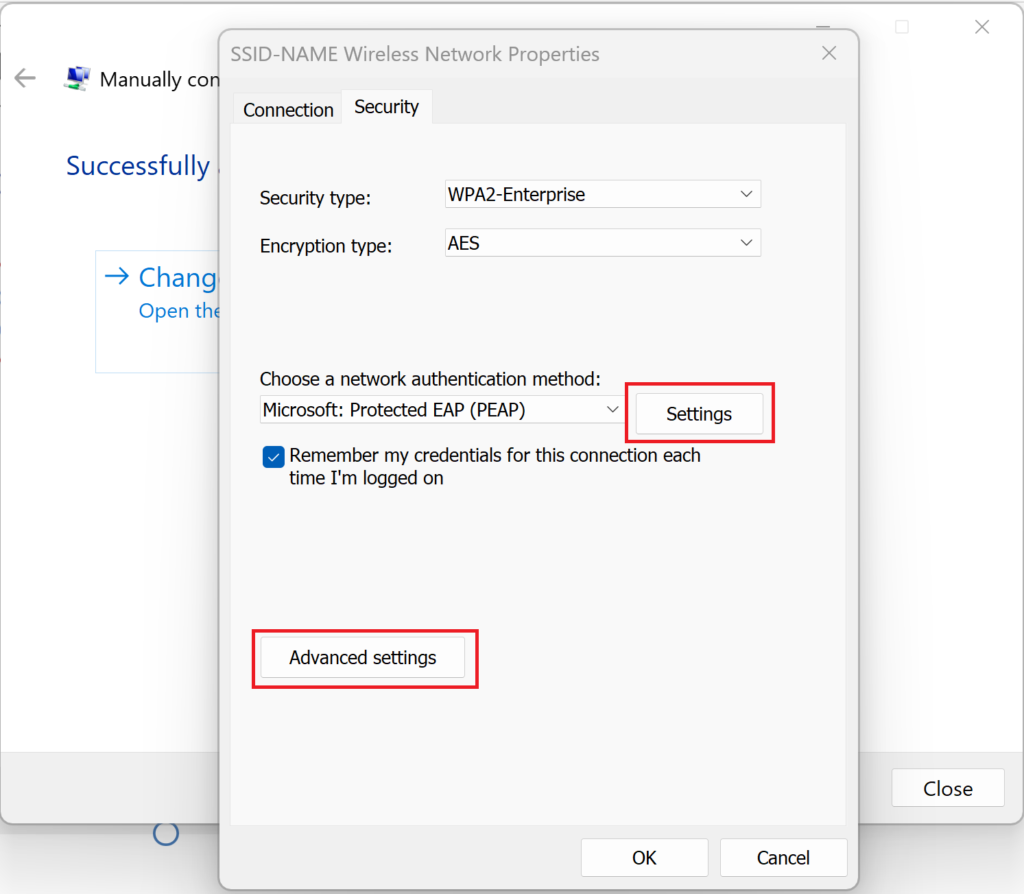
Enter the SSID name that is configured for 802.1x, and Select Security type as WPA2-Enterprise.
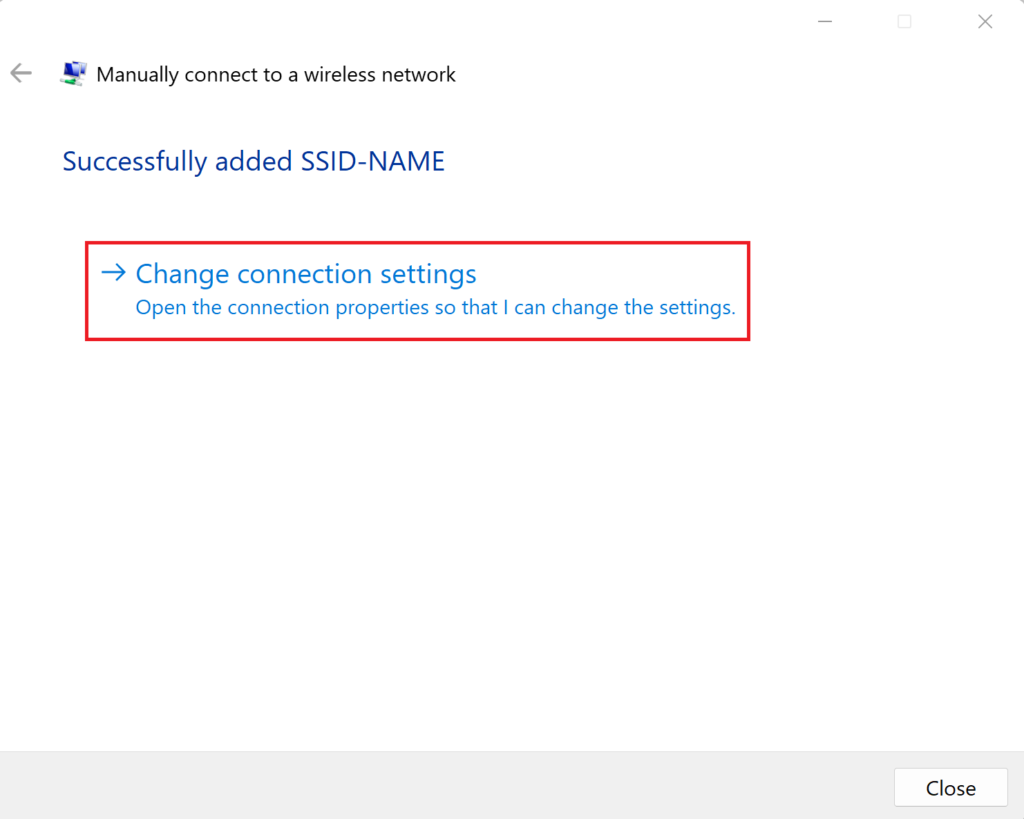
Change the connection setting:
Check the settings configuration, and Advanced Setting one by one.
1> For User authentication only, select user authentication from the drop-down.
2> For Computer Authentication only, select computer authentication from the drop-down. Computer authentication ensures valid machines are connecting to the network.
3> For User or computer authentication, select user or computer authentication from the drop-down
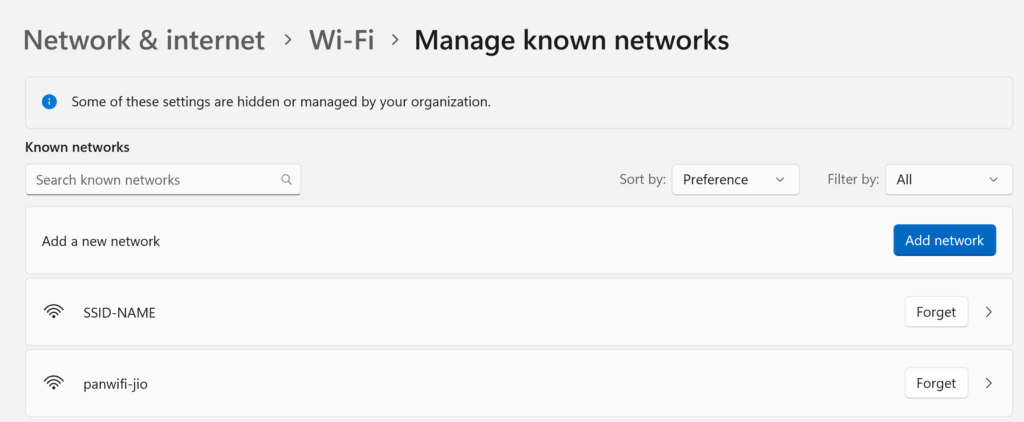
Under Manage Know Networks Setting, you can find the configured SSID:
Note: If settings are disabled from GPO then we would have to configure the setting using GPO.
Once the endpoint is configured we need to configure the switch for radius configuration and We need to configure radius server for the authentication.
Visit our blog post on how to perform the configuration using GPO to perform mass deployment on multiple endpoints.